If you’ve crafted something beautiful in Canva and are now wondering, “How do I bring this to life on WordPress?Welcome! You’re at the right place. Converting Canva to WordPress is easier than you might think, and it’s the perfect way to blend Canva’s design simplicity with WordPress’s powerful website capabilities.
In this simple guide, we will walk you through the entire process step-by-step. You’ll learn how to pick the perfect template in Canva, tweak it to your liking, export it in the right format, and then seamlessly embed it into your WordPress site. Ready to give your website a fresh, professional look with Canva? Let’s get started!
Understanding the Basics of Canva and WordPress
Before getting into the nitty gritty of converting Canva to WordPress, it’s important you understand the basics of both tools.
What is Canva?
Canva is a popular online graphic design platform that allows users to create stunning visuals without the need for advanced design skills.
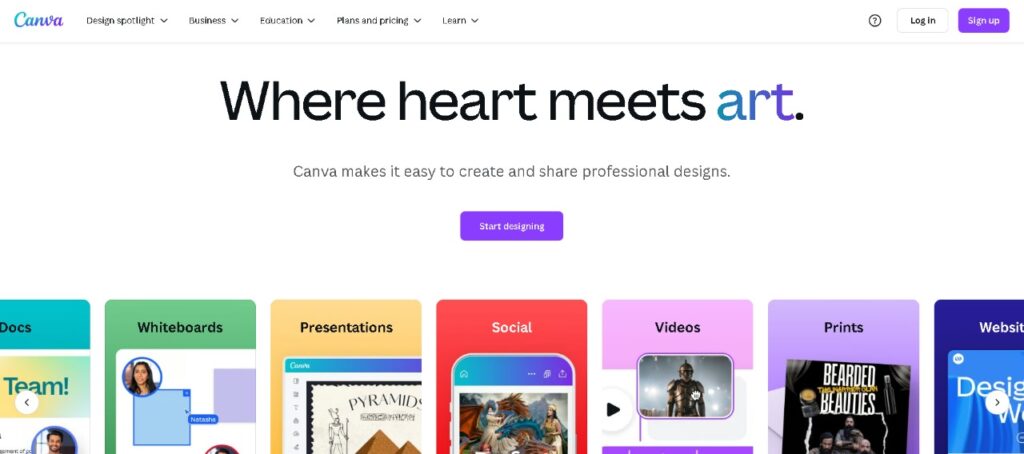
Many users turn to Canva website template designs as a starting point for creating personal or business web content due to their ease of use and professional appearance.
When creating a Canva website, you’re working with a drag-and-drop interface that simplifies the design process. You can access various file formats, export your visuals, and even embed Canva content elsewhere.
However, while Canva is great for visual creation, it lacks the depth and flexibility needed for advanced websites, especially when it comes to functionality, scalability, and SEO.
To fully bring your design to life online, many creators look to convert Canva designs into more robust platforms like WordPress, where added features and customization are possible.
What is WordPress?
WordPress is a powerful and flexible content management system (CMS) that powers over 43.5% of all websites on the internet.
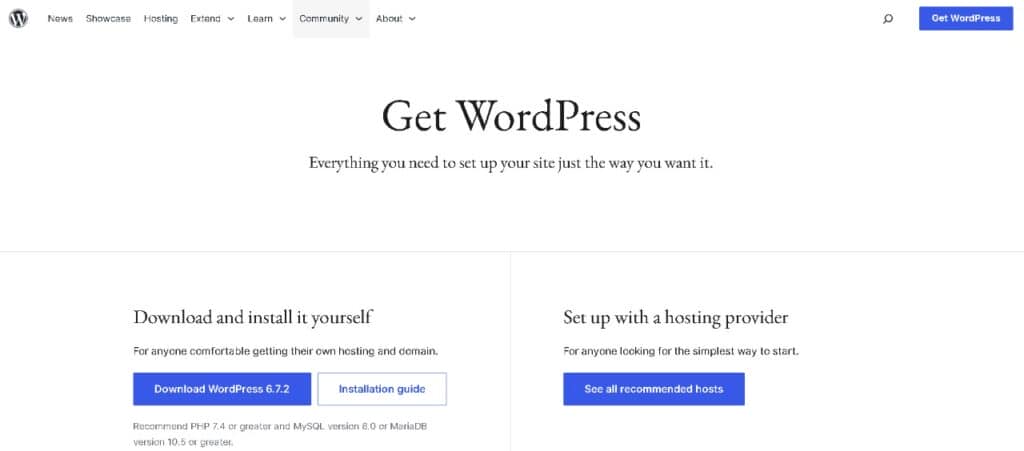
Unlike Canva, which is primarily a design tool, WordPress is built for full website development and content management, offering thousands of themes, plugins, and integrations that allow users to create anything from blogs to eCommerce sites.
By setting up a WordPress account, you gain access to a platform that supports dynamic pages, advanced functionality, and user-friendly tools for managing everything from text and images to SEO and site speed.
While Canva helps visualize and plan layouts, WordPress makes those layouts interactive and scalable.
You can embed Canva designs if needed, but for a fully functional WordPress website, you’ll likely need to make necessary adjustments to optimize images, layout, and structure for web performance.
Read More: Canva vs WordPress Comparison: Which is the Best
Ditch the steps and instead just check out this video tutorial to see everything in action!
How to Convert Canva to WordPress
Now, let’s get going with our simple step-by-step guide on how to convert from Canva to WordPress.
Method 1: Convert Canva to WordPress Using HTML Code
One of the most straightforward ways to move your design from Canva to WordPress is by using HTML code. This method is great if you want full control over how your design looks on your site and are comfortable working with basic web code.
Here’s how it works, step-by-step:
Finalize Your Canva Design
Before anything else, make sure your Canva design is ready to go. This means all the content, colors, fonts, spacing, and images should be just the way you want them.

Whether it’s a homepage banner, a service section, or a portfolio layout, just take a final look and double-check your design is polished.
It’s always easier to build when you’re working from a finalized layout.
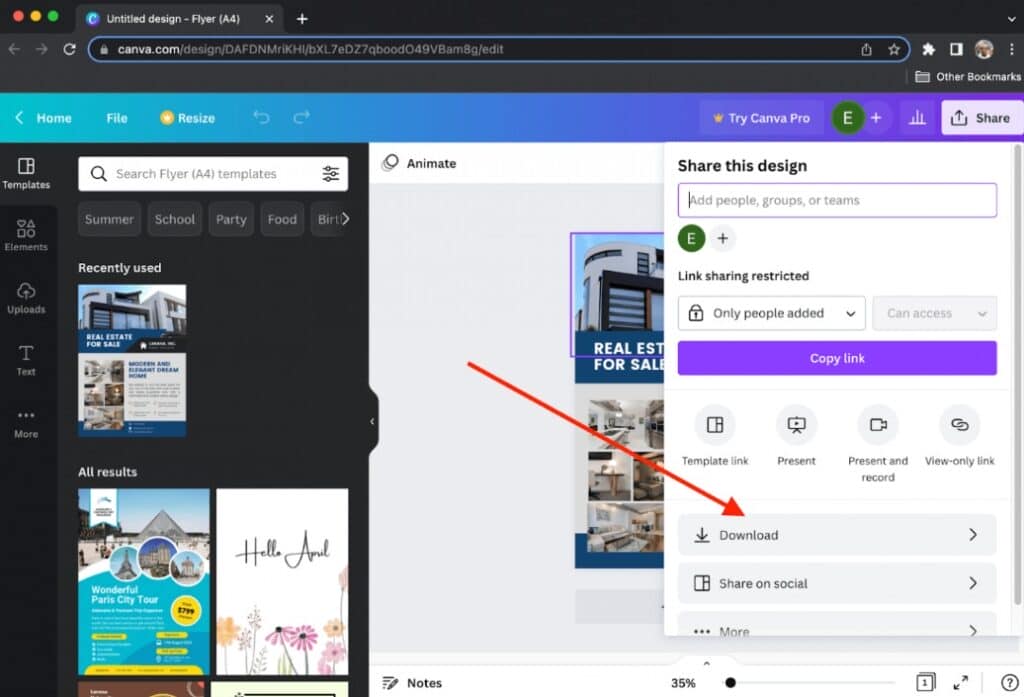
Download Your Design Elements
Once you’re happy with your design, it’s time to download the elements from Canva. These include images, logos, graphics, and any decorative elements you’ve added.
Log in to Your WordPress Site
Now head over to your WordPress website. Use your credentials (username and password) to log in to the dashboard. This is your website’s control panel, where all the behind-the-scenes work happens, like creating pages, uploading media, and customizing layouts.
Once you’re logged in, you’re ready to bring your Canva design to life on your site.
Upload Canva Assets to the Media Library
Inside the WordPress dashboard, find the “Media” tab on the left menu. Click on “Add New” and upload all the design files you downloaded from Canva. These files will now be stored in your WordPress media library, ready to be added to any page or post.
Uploading your assets first ensures everything’s organized and easily accessible when building your layout.
Create a New Page or Post
Go to “Pages” or “Posts” depending on where you want your Canva design to appear, and click “Add New.” This opens a fresh content editor where you can start building your page.
Here, you’ll switch to a more technical view, called “Custom HTML” or “Text” view, so you can manually build the layout piece by piece by adding your HTML code.
Preview and Publish Your Page
Once your layout is built and styled, it’s time for the finishing touches. Hit “Preview” to check how the page looks. Make sure everything is aligned properly, images are displaying correctly, and the overall design reflects your Canva layout.
If all looks good, go ahead and hit “Publish.” That’s it!
You’ve successfully converted your Canva design to WordPress using HTML. This method may take more time, but it gives you a cleaner, more customized, and performance-optimized site.
Pros:
- Total Design Control: No limitations, replicate Canva designs exactly.
- No Need for Extra Plugins: Keeps your site fast and lean.
- Better SEO and Performance: Clean HTML loads faster and gives you control over headings, alt tags, etc.
Cons:
- Requires HTML/CSS Skills: Not beginner-friendly.
- Static Layout: You can’t edit content visually without going back into the code.
- Time-Consuming: Especially if your Canva design has many pages or sections.
Best Suited For:
- Web developers and tech-savvy users
- Single-page layouts or hero sections
- Portfolios or marketing pages where visual precision is important
- Brands that prioritize speed, control, and clean code
Also Check Out: Great Tools to Test WordPress Performance and Speed Effectively
Method 2: Recreate Canva Design with a WordPress Page Builder
This approach is perfect if you’re looking for a beginner-friendly and visual way to bring your Canva to WordPress design to life, no coding required.
Let’s break it all down, step by step:
Install a WordPress Page Builder

Start by installing a page builder plugin. Some of the most popular ones include:
- Elementor: Offers a free version with essential features.
- Beaver Builder: Known for its stability and developer-friendly approach.
- Divi: Comes with a vast library of pre-made layouts.
You can install these by going to your WordPress dashboard ⟶ Plugins ⟶ Add New, then search for the builder of your choice and click Install ⟶ Activate.
Create a New Page and Launch the Builder
Now go to Pages ⟶ Add New and give your page a title. Click the button to “Edit with Elementor” (or your chosen builder). This will open a live visual editor where you can begin constructing your layout.
Rebuild Your Canva Layout Block by Block
Refer to your Canva design and rebuild it inside the page builder. Use drag-and-drop elements like headings, text boxes, images, and buttons to match the layout. Most builders let you divide the page into sections and columns, giving you full control over structure and spacing.
Upload Canva Assets to WordPress
Upload all downloaded Canva assets to your WordPress Media Library. These can then be added directly into your design using image or background widgets in your page builder.
Preview and Publish Your Page
Once you’ve built your page and optimized it for all screen sizes, preview it to see how it looks live. Make any final tweaks as needed, then click Publish. Your Canva-inspired page is now live on your WordPress site.
Pros:
- No coding required: Drag-and-drop interface is beginner-friendly
- High customization: Adjust fonts, colors, spacing, and layout to match your Canva design
- Responsive design tools: Easily preview and edit for mobile, tablet, and desktop views
- Reusable elements: Save time with templates, global blocks, and pre-built sections
Cons:
- Learning curve: Takes time to get used to builder tools if you’re new
- Can affect performance: Overuse of widgets or animations may slow down your site
- Some features are paid: Advanced design options may require premium versions
Best Suited For:
- Beginners and non-coders looking for a simple
- Designers who want to match a Canva layout with precise styling
- Small business owners creating landing pages or branded sections quickly
Method 3: Hire a Service Provider to Convert Canva to WordPress
If you’re looking for a hassle-free, professional way to convert your Canva design into a fully functional WordPress site, you’re in the right place.
At Seahawk, we offer expert WordPress services specifically designed to turn beautiful visuals into clean, responsive, high-performing websites.
We don’t just copy and paste your design, we carefully translate your Canva design into a custom-built WordPress website that looks exactly the way you envisioned it, while making sure it performs well on every device. Here’s how we can help you:
- Pixel-perfect conversion of your Canva design into a responsive WordPress layout
- Speed-optimized development to ensure your site loads fast and performs smoothly
- Mobile-first approach so your site looks great on all screen sizes
- SEO-friendly coding practices for better visibility on search engines
- Flexible editing options so you can manage content easily after launch
We can also integrate advanced features like contact forms, animations, eCommerce functionality, and more, whatever your website goals may be.
Learn: WordPress Hacked? Here’s How to Fix a Hacked WordPress Site
Turn Your Canva Designs into Stunning WordPress Websites
Our expert developers ensure pixel-perfect conversion, fast loading, and mobile responsiveness, no compromises
Maintaining and Optimizing Canva Design on WordPress
Once you’ve added your Canva designs to WordPress, it’s important to optimize them for both website performance and SEO.

Not only will this help your site load faster, but it’ll also boost your rankings in search engines. Here’s how you can do it:
- Optimize for Performance and SEO: Once your Canva visuals are live on WordPress, optimizing them ensures your site loads fast and ranks higher in search engines. Compress images before uploading for compatibility.
- Use SEO Plugins for Better Visibility: WordPress has several powerful SEO plugins like AIOSEO, Yoast SEO, and Rank Math. These help you fine-tune meta titles, descriptions, and image alt text, which are crucial for search engine visibility. You can also generate and submit XML sitemaps, control crawl settings, and get real-time optimization tips.
- Update Designs and Content Regularly: A site that stays fresh performs better, both for users and search engines. If your content or designs feel outdated, simply hop back into Canva, tweak your graphics, and re-upload them to WordPress.
- Maintain Website Security: Security is often overlooked, but it’s crucial. Regularly update your WordPress core, themes, and plugins to protect against vulnerabilities. Use strong passwords, two-factor authentication, and consider a security plugin like Solid Security (formerly iThemes), or Wordfence.
Read: How to Update WordPress Automatically and Manually
Tips for a Smooth Transition from Canva to WordPress
When moving from a Canva website template to a WordPress site, it’s important to treat your Canva design as a guide, not something to copy exactly.
- Use Canva as a visual guide: Treat your Canva website templates as a reference, not an exact layout. Canva’s vast library and drag-and-drop features are perfect for planning, but your WordPress site may need layout adjustments for responsiveness and functionality.
- Get expert help if needed: If your Canva template includes advanced design elements or interactive features, consider hiring a developer. They can help recreate those elements in WordPress while optimizing performance and compatibility across devices.
- Maintain brand consistency: Carry over colors, fonts, and visuals from your Canva account and social media posts to your WordPress site. This ensures a consistent brand experience, whether someone visits your website or sees your content elsewhere.
Wrapping Up
To summarise, integrating Canva designs into your WordPress site involves a series of straightforward steps that anyone can follow.
Each step is crucial for achieving a professional-looking website, from creating and customizing your designs in Canva to preparing, exporting, and uploading them to WordPress. Proper site optimization and regular updates ensure that your site remains engaging, functional, and secure.
By following this guide, you can unlock the full potential of Canva and WordPress, transforming your website into a visually appealing powerhouse. Embrace the seamless integration of these two powerful tools and elevate your web design to new heights.
