When you think about creating an engaging WordPress blog, images play a bigger role than most people realize. The right image size does more than just make your posts look attractive. It can improve site speed, support responsive design, and even boost your SEO performance. On the other hand, uploading images without paying attention to their dimensions or file size can leave you with slow loading times, blurry pictures, and a poor user experience.
So, what’s the best size for blog post images for WordPress? The answer depends on where and how you plan to use them. Featured images, thumbnails, header images, and in-content visuals all have their own requirements. WordPress helps by generating default image sizes automatically, but there are also ways to define custom image sizes to match the exact dimensions your theme needs.
In this guide, we’ll walk through everything you need to know about blog post image size for WordPress. From understanding the default image sizes to optimizing image file size for site speed, you’ll learn how to upload images correctly, maintain high image quality, and use custom image sizes where necessary. Whether you’re working with existing images in your media library or uploading new ones, these tips will help ensure that every image displayed on your WordPress site looks sharp, loads fast, and fits perfectly.
Understanding WordPress Image Sizes
Before you can pick the best blog post image size for WordPress, it helps to understand how WordPress itself handles images. Every time you upload an image, the platform automatically creates multiple versions of it in different dimensions. These are called default image sizes, and they ensure your images can be displayed correctly across different parts of your site without you needing to resize images manually.
By default, WordPress generates:
- Thumbnail size – 150 x 150 pixels
- Medium size – 300 x 300 pixels (maximum)
- Large size – 1024 x 1024 pixels (maximum)
- Full size – the original image you uploaded
These settings can be adjusted in your Media Settings tab inside the WordPress dashboard. If you go to Settings → Media, you’ll see the width and height fields for each default size. Changing these values allows you to define custom image sizes that better suit your WordPress theme and blog layout.
Why does this matter? Because not every image is used the same way. A featured image in a blog post will need different dimensions than a thumbnail in your sidebar or a header image at the top of the page. Using the wrong image size can make your site look unprofessional and also increase file size unnecessarily, which impacts site speed.
The good news is that WordPress images are designed to be flexible. The system selects the most appropriate size depending on where the image appears, and modern themes even make use of responsive images to adjust automatically for different screen sizes. Understanding these basics gives you a strong foundation before moving on to the exact dimensions that work best for blog posts and featured images.
Want Perfectly Optimized Images on Your WordPress Blog?
Seahawk’s expert WordPress development team ensures every image is sized, compressed, and displayed for maximum speed and SEO impact.
Best Blog Post Image Sizes in WordPress

One of the most common questions WordPress users have is about the exact dimensions their blog images should be. The truth is there is no single size that works for every case. Different areas of your WordPress website use images differently, and each requires the right balance between image quality, file size, and responsiveness.
Here are the most widely accepted sizes you can rely on when uploading images for blog content:
- Featured image size – 1200 x 630 pixels is ideal for most WordPress themes. This size also works well for social media previews, giving your posts a polished look when shared on platforms like Facebook or X.
- Inline blog post images – 1200 x 675 pixels (16:9 aspect ratio) is a safe choice for images placed inside articles. For posts with a two-column layout, images around 680 x 382 pixels often look best.
- Header images or banners – A header image usually works best at 1048 x 250 pixels, but this may vary depending on your theme. Some themes use wider hero sections that can go up to 1920 pixels in width for full-screen displays.
- Portrait images – 900 x 1200 pixels work well if you’re including tall visuals, infographics, or photography that looks better vertically.
- Square images – 600 x 600 pixels or 150 x 150 pixels (thumbnail size) are commonly used for grid layouts, galleries, or sidebar displays.
When you stick to these dimensions, your images not only look sharp but also remain lightweight enough to keep your page speed high. Remember, larger images with no resizing can slow down your site. A blog post image size that balances clarity with smaller file size is always the winning combination.
Pro tip: Before you upload images, check your WordPress theme documentation. Many themes recommend exact dimensions for featured images and headers to ensure consistency across your design. If your theme crops images automatically, adjusting your upload dimensions to match will save you time and prevent awkward cropping.
Choosing the Right Image Size for Different Areas of Your Website
Your WordPress blog is made up of more than just posts. From logos to background images, every element requires the correct size to look sharp and load quickly. Using the wrong dimensions can cause stretching, pixelation, or unnecessary file size increases. Here’s a breakdown of the most common areas of a WordPress website and the image sizes that work best:
Featured Images and Thumbnails
- Featured images usually work best at 1200 x 630 pixels for modern themes.
- Thumbnails default to 150 x 150 pixels, but you can define custom image sizes in your media settings if you want larger square images for grids or archives.
Background and Hero Images
- For background images that span the full width of a page, aim for 1920 x 1080 pixels. This size works well for desktops while still scaling for smaller screens.
- Hero headers and sliders often use the same dimensions, but check your theme documentation to confirm the maximum width required.
Logo Image Size
- A good starting point is 300 x 100 pixels for logos.
- If your theme uses a smaller logo area, WordPress will scale it down automatically. To maintain image quality, always upload a slightly larger logo than the displayed size.
Favicon (site icon)
- The recommended favicon size is 512 x 512 pixels.
- WordPress automatically resizes it for different screen sizes and browser tabs, so this one upload is enough.
Social Sharing Images
- Social media platforms rely on Open Graph images. A safe choice is 1200 x 630 pixels.
- These dimensions ensure your WordPress featured image looks professional when your post is shared on Facebook, X, or LinkedIn.
By tailoring your image dimensions to the specific area of your WordPress site, you ensure a consistent and polished look across devices. Not only do the right sizes improve design, but they also reduce unnecessary file size, which helps keep your site fast and SEO-friendly.
Optimizing Image File Sizes for Faster Loading
Choosing the right image dimensions is only half the job. The other half is keeping your image file size under control so your WordPress website loads quickly. A large image file might look beautiful, but if it slows down your site speed, it will frustrate visitors and hurt your search rankings.
Why Image File Size Matters
- A heavy file size increases the time it takes for a page to load.
- Search engines factor site speed into rankings, so oversized images can directly affect SEO.
- On mobile devices, larger images also consume more bandwidth, leading to a poor user experience.
Ideal File Sizes for Blog Post Images
- Most blog post images should stay under 150 KB whenever possible.
- Larger images, like background photos or full-width banners, may range between 300 KB and 500 KB depending on quality.
- Avoid uploading multi-megabyte photos directly from a camera without resizing or compressing first.
Tools for Compressing Images
Before you upload images to your WordPress media library, it’s smart to compress them. Compression reduces file size without sacrificing visible image quality. Some recommended tools include:
- TinyPNG – simple drag-and-drop compression for PNG and JPEG.
- Squoosh – Google’s free tool for adjusting quality and formats.
- ShortPixel – great for bulk image compression.
- ImageOptim – a desktop app popular among developers.
WordPress Plugins for Automatic Optimization
If you want to skip manual compression, several image optimization plugins handle this for you. Popular options include:
- Smush – compresses images automatically as you upload them.
- EWWW Image Optimizer – offers advanced optimization features.
- Imagify – balances speed and image quality effectively.
By reducing file size while keeping your image quality sharp, you give your blog posts a professional look without sacrificing performance. Image optimization is one of the simplest but most powerful steps to improve both user experience and search visibility.
Best Image Formats for WordPress

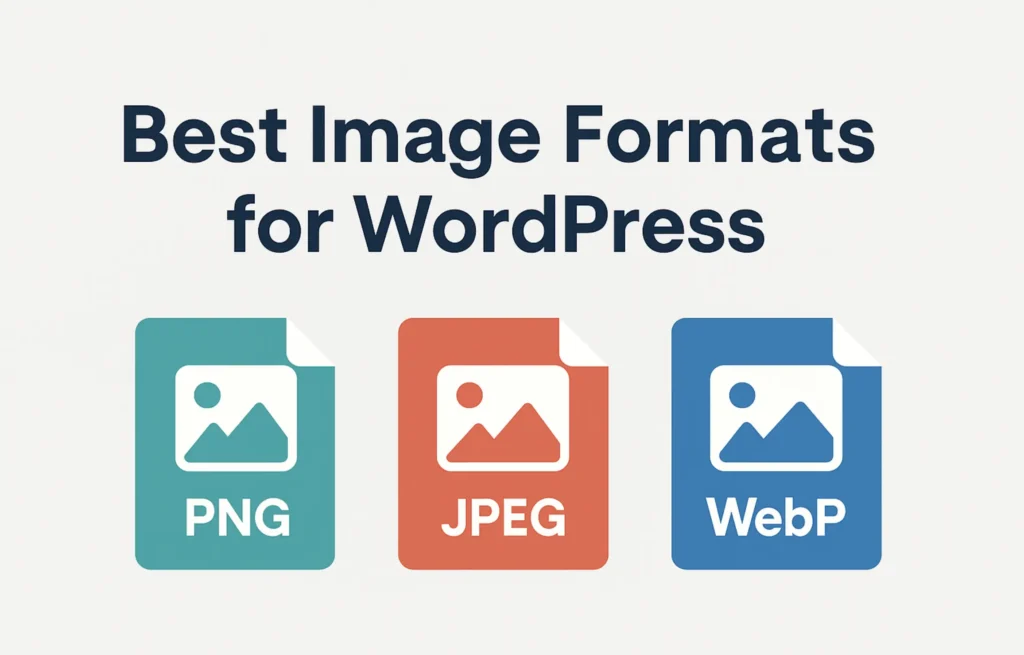
Picking the right image format is just as important as choosing the correct image dimensions. Each format balances image quality and file size differently, so knowing when to use JPEG, PNG, WebP, or other formats can make a big difference in how your WordPress site performs.
JPEG
- Best for photographs or images with many colors.
- Offers strong compression, which reduces file size while keeping decent quality.
- Works well for featured images and blog post images where speed matters.
PNG
- Ideal for graphics, illustrations, and images that require transparency.
- Produces higher quality than JPEG but results in larger file sizes.
- A good choice for logos, icons, and design elements that need a crisp look.
WebP
- A modern format developed by Google that offers the best of both worlds.
- Provides smaller file sizes than JPEG and PNG while keeping high quality.
- Supported by most modern browsers and recommended for responsive images across different screen sizes.
- Some WordPress themes and image optimization plugins can automatically serve WebP versions of your images.
GIF
- Limited to 256 colors but supports animation.
- Best for simple graphics or small animated visuals rather than blog post images.
SVG
- A vector format that works well for logos and icons.
- Scales infinitely without losing quality.
- Needs to be handled carefully in WordPress for security reasons, often with the help of a plugin.
Pro Tip: For blog posts, stick to JPEG for photos, PNG for transparent graphics, and WebP when you want faster page speed with no loss in image quality. Mixing the right image formats with optimized dimensions gives your WordPress images a professional finish while keeping file size small.
WordPress Plugins to Manage and Optimize Images
One of the easiest ways to keep your WordPress images in check is by using plugins. Instead of manually compressing or resizing every photo before upload, these tools automatically handle image optimization in the background. They also give you control over default image sizes, custom image sizes, and file formats so that all your blog post images are delivered in the most efficient way.
Smush
Smush is one of the most popular image optimization plugins. It compresses images as soon as you upload them to the media library, helping reduce file size without affecting visible image quality. It also offers lazy loading and bulk optimization for existing images.
EWWW Image Optimizer
EWWW goes beyond simple compression. It can automatically convert images into faster formats like WebP and even resize images to the maximum dimensions you set. For bloggers who upload photos directly from cameras, this saves time and storage space.
Imagify
Imagify offers three levels of compression, giving you flexibility based on whether you want perfect quality or the smallest file size possible. It integrates seamlessly with the WordPress media settings and can optimize existing imagesin bulk.
WebP Express
This plugin helps you serve responsive images in WebP format while keeping backups of your original image files. Many users prefer it because it balances image quality with modern browser support.
Resize Image After Upload
A lightweight plugin that automatically resizes images to custom dimensions the moment you upload them. This is perfect for bloggers who forget to scale images before uploading, ensuring oversized photos don’t eat up bandwidth or slow down page speed.
By combining the right plugins, you can automate most of the heavy lifting when it comes to image optimization. Whether you want to compressing images, define custom sizes, or convert to WebP, these tools make sure your blog post images always look great and load fast.
Advanced Tips for Responsive and SEO-Friendly Images
Even if you choose the right image size and compress your files, there are a few extra steps that can take your WordPress images to the next level. These advanced practices help your blog posts rank higher in search results, improve page speed, and ensure that your images look great on every device.
Use Responsive Images
WordPress automatically generates responsive images by creating multiple sizes of the same upload. Modern browsers then choose the best size depending on the user’s screen. To make the most of this feature, always upload high quality images that WordPress can scale down without losing clarity.
Add Alt Text for Every Image
Search engines cannot “see” images, so they rely on alt text to understand what your image is about. Adding descriptive alt tags improves accessibility and can help your blog post images appear in Google Images, bringing in more organic traffic.
Optimize Image Titles and File Names
Before uploading, rename your image file with descriptive keywords instead of generic names like “IMG_4567.jpg.” For example, “wordpress-featured-image-size.jpg” is much more SEO-friendly.
Use Lazy Loading
Lazy loading delays the loading of images until the visitor scrolls to that section of the page. This reduces initial load time and is especially useful for blog posts with lots of visuals. WordPress has lazy loading enabled by default, but you can enhance it further with plugins.
Consider an Image Sitemap
If your blog relies heavily on visuals, adding an image sitemap can help search engines index all your content. Many SEO plugins like AIOSEO include this feature, making it simple to set up.
By combining responsive images, optimized metadata, and lazy loading, you’ll make sure your WordPress site displays high quality images without sacrificing speed or SEO performance.
Common Mistakes to Avoid with Blog Post Images
Even experienced bloggers sometimes make errors when working with WordPress images. These mistakes often lead to poor image quality, slow site speed, and inconsistent design. Here are the most common ones to watch out for:
Uploading Oversized Images Directly
One of the biggest mistakes is uploading photos straight from a camera or stock library without resizing. These larger images can be several megabytes in file size, which drastically slows down your WordPress website. Always resize images before uploading them to match the exact dimensions your theme requires.
Ignoring Theme-Specific Requirements
Every WordPress theme handles featured images, thumbnails, and headers differently. If you don’t check the recommended image dimensions in your theme documentation, you may end up with cropped or distorted visuals.
Forgetting to Compress Images
Skipping image compression is another common issue. Without reducing file size, even the right image dimensions can load too slowly. Using tools or image optimization plugins makes this process simple and automatic.
Using the Wrong Aspect Ratio
Not paying attention to aspect ratio can make your blog post images look awkward. A stretched featured image or an uneven thumbnail creates a poor impression. Always aim for consistent ratios such as 16:9 for blog posts or 1:1 for square thumbnails.
Not Updating Existing Images
If you change your default image sizes in WordPress or switch to a new theme, older uploads may not fit correctly. Regenerating thumbnails or adjusting custom image sizes ensures that your existing images still look professional.
By avoiding these mistakes, you’ll save storage space, improve page speed, and keep your WordPress blog visually consistent across devices.
How Seahawk Can Help You Get Image Sizes Right
Getting the right blog post image size in WordPress can feel overwhelming if you are new to the platform. From default image sizes and custom image sizes to image optimization plugins and responsive layouts, there are many factors that affect how your images appear and how fast your site loads. This is where Seahawk steps in.
At Seahawk, our team specializes in WordPress website design, development, and optimization. We ensure that every featured image, header image, and inline visual is perfectly sized for your theme and audience. Beyond dimensions, we also handle image compression, responsive images, and advanced SEO practices so that your site not only looks great but also performs flawlessly across all screen sizes.
Whether you are launching a new WordPress blog or want to fix issues with your existing images, Seahawk provides complete support — from defining custom image sizes to setting up the best image optimization features for long-term performance.
Explore Seahawk’s WordPress Development Services and let us help you build a site that delivers both high quality images and top performance.
Conclusion: Choose the Right WordPress Image Sizes
Choosing the right blog post image size in WordPress is more than a design choice. It directly affects site speed, user experience, and search visibility. By understanding default image sizes, defining custom image sizes, and using proper image optimization techniques, you can display crisp, high quality visuals while keeping file size small.
From featured images and headers to responsive galleries and social media shares, every image displayed on your WordPress site should be tailored to the correct image dimensions. Remember to compress files, select the right image format, and check your WordPress theme documentation for exact recommendations.
With these best practices, your WordPress blog will load faster, look sharper, and rank better. And if you need expert help, Seahawk is ready to guide you in creating a visually stunning and performance-driven site with perfectly optimized images.
Frequently Asked Questions
What is the ideal blog post image size for WordPress?
A safe starting point is 1200 x 630 pixels for most featured images and in-content visuals. This size displays well across different WordPress themes and social platforms while keeping file size manageable.
How large should my image file size be?
Aim for 150 KB or less for standard blog post images. Full-width headers or background images can be slightly larger (around 300–500 KB) if compressed with tools like TinyPNG or ShortPixel to maintain image quality.
Can I change the default WordPress image sizes?
Yes. Go to Settings → Media in your WordPress dashboard to adjust thumbnail size, medium size, and large size. You can also use code or plugins to define custom image sizes for special layouts.
Which image format works best for WordPress images?
Use JPEG for photos, PNG for graphics or images needing transparency, and WebP for a modern format that balances small file size with high quality.
Do I need an image optimization plugin?
While you can resize and compress images before upload, plugins like Smush, EWWW Image Optimizer, or Imagifyautomatically compress and serve responsive images, helping maintain fast site speed without extra effort.


