Adding a tip option to your WooCommerce checkout page is a smart way to increase your store’s revenue and enhance customer satisfaction. It gives shoppers a simple, optional way to show appreciation for your service, products, or cause.
Whether you run a restaurant, charity, or eCommerce store, tips can create a more engaging experience while supporting your team or mission.
WooCommerce doesn’t offer this feature by default, but it’s easy to implement with the right plugin. In this guide, you’ll learn how to add a tip option using both free and premium tools.
Why Add a Tip Option to WooCommerce Checkout?
Here are the key reasons why adding a tip feature is beneficial for your store:

- Boost Revenue Without Raising Prices: Tips give customers the chance to contribute more voluntarily. When prompted clearly and respectfully, many are willing to tip for excellent service, helping increase your average order value.
- Encourage Team Motivation and Goodwill: Tipping allows customers to recognize your team’s efforts. It also promotes goodwill, supports a cause, or builds loyalty, especially when customers feel their tip goes to something meaningful.
- WooCommerce Doesn’t Support Tips by Default: Out of the box, WooCommerce lacks a tipping feature. Therefore, to enable this functionality, you’ll need to install a plugin specifically designed for adding tip options at checkout.
Supercharge Your WooCommerce Store with Expert Development Support
Whether you need custom checkout features, tip integration, or a fully optimized store, we can help!
Step‑by‑Step Using Free Plugin (FunnelKit Funnel Builder)
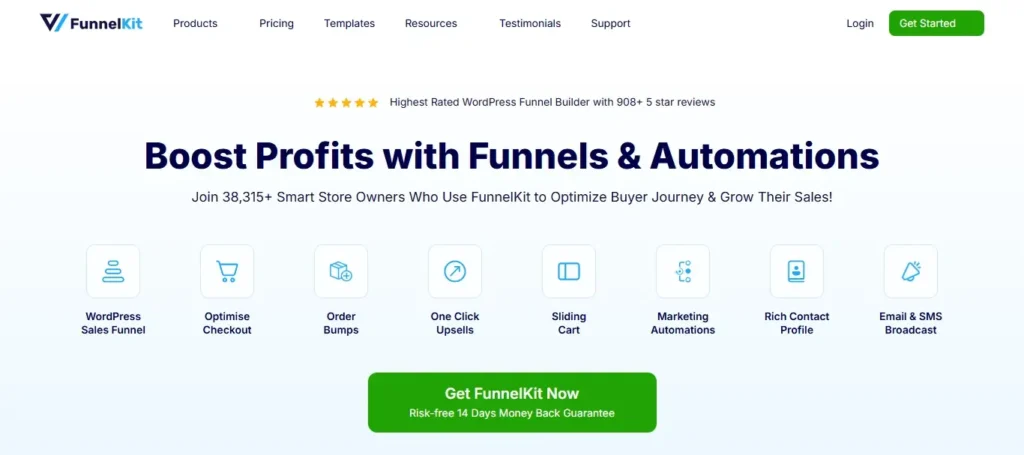
Adding a tip option to your WooCommerce checkout page becomes much easier when using the FunnelKit Funnel Builder plugin.

This plugin offers far more than just tipping; it allows you to create optimized, high-converting checkout flows. With the free version of FunnelKit, you can set up custom order bumps and checkout fields, including tips, with ease.
In this section, we’ll walk you through the entire setup process to help you create a seamless tip option using this flexible tool.
Step 1: Install and Activate FunnelKit Funnel Builder
Before you can customize your checkout, you need to install the FunnelKit plugin.
- Go to your WordPress Dashboard → Plugins → Add New.
- Search for FunnelKit Funnel Builder.
- Click Install Now, then Activate the plugin.
- Once activated, a new menu called FunnelKit will appear in your dashboard.
This plugin integrates directly with WooCommerce and allows you to build custom checkout pages using Elementor, Gutenberg, or Oxygen builder.
Step 2: Create a Custom Checkout Funnel
FunnelKit uses a “funnel” structure, which includes a custom checkout step. To add a tip field, you’ll start by building this funnel.
- Navigate to FunnelKit → Store Checkout.
- Click on Create Store Checkout and choose from a set of ready-made templates or build from scratch.
- Select the page builder you prefer (Elementor, Gutenberg, etc.).
- Name your funnel and proceed.
Your funnel will now include a custom checkout page where you can insert the tip option.
Step 3: Add a Tip as an Order Bump
In FunnelKit, tips are typically added as a one-click order bump. These appear during checkout and let users add a predefined product (in this case, a “Tip”) to their order.
- Go to FunnelKit → Store Checkout → Edit Funnel → Order Bumps.
- Click Add New Order Bump.
- Create a simple WooCommerce product titled “Tip” with a low price (e.g., $2, $5, or a percentage).
- Assign this product as the order bump.
- Customize the bump title, message (e.g., “Would you like to leave a tip?”), and appearance.
FunnelKit allows full control over how this order bump appears and behaves. You can even enable conditional logic (such as only showing the tip for orders above $20).
Step 4: Design and Customize the Tip Layout
Next, use your selected page builder to style the tip section. If you’re using Elementor:
- Click Edit Checkout Page with Elementor.
- Navigate to the order review or payment section.
- Drag and drop FunnelKit widgets or use Elementor’s native elements to format the tip offer.
- Align the bump section near the cart total for better visibility.
- You can customize fonts, buttons, borders, and icons to match your site branding.
A well-designed layout ensures users understand the purpose of the tip and feel comfortable contributing.
Step 5: Set Tip Visibility and Conditions (Optional)
One of FunnelKit’s strengths is conditional display logic. This allows you to show the tip option only when specific rules are met. From the Order Bump settings, open the Rules Engine.
Set conditions such as:
- Show tip if cart total is greater than $30.
- Display for logged-in users only.
- Hide tip for certain product categories.
This targeted approach helps avoid overwhelming the user and maintains a cleaner checkout experience.
Step 6: Test the Checkout Flow
Before making your new checkout live, it’s crucial to test the entire flow.
- Go to your website in incognito mode or as a test user.
- Add products to the cart and proceed to checkout.
- Ensure the tip option displays properly and adds to the cart when clicked.
- Verify that the tip amount appears in the order summary and that the total is updated correctly.
- Complete a test purchase to confirm email receipts and thank-you pages reflect the tip.
Step 7: Go Live and Monitor Performance
Once everything looks good, publish your funnel and redirect your WooCommerce checkout to use the new one.
- In WooCommerce → Settings → Advanced, update the Checkout Page to your FunnelKit version.
- Monitor performance through order data and user feedback.
- If needed, adjust tip amounts, placement, or text based on customer behavior.
You can also A/B test different versions of the tip offer with FunnelKit Pro.
By using FunnelKit Funnel Builder, you create a highly customizable and conversion-focused checkout experience.
Whether you’re a beginner or an experienced store owner, this approach allows you to introduce tipping without code while optimizing user experience and increasing order value.
Ultimate Guide: Hiring WooCommerce Developers
Top WooCommerce Plugins to Add Tip Option
We review the most widely used plugins. Each offers tip selection via predefined amounts, percentages, or custom input.
FunnelKit Funnel Builder
Beyond tipping, FunnelKit helps build conversion‑optimized checkout funnels. It integrates tipping as an order bump or part of the funnel flow. Key features of this tool are:
- Create a custom checkout using page builders (Elementor, Gutenberg, etc.).
- Add a tip as a product or order bump.
- Conditional rules show the tip only for certain carts.
- Fully customizable in design and placement.
Related: Top WooCommerce Sales Funnel Plugins
WPC Order Tip for WooCommerce (Free + Premium)
WPClever’s WPC Order Tip plugin is widely used. It lets customers choose a tip amount or percentage. It includes a “No thanks” option and integrates into checkout without coding. Its key features include:
- Set tip position on checkout page (six position choices).
- Pre‑set tip values.
- Custom text and styling, optional “No Thanks” button.
- Works with most themes and payment gateways.
Setup Steps:
- Install via Plugins → Add New, search “WPC Order Tip”, install and activate.
- Go to WPClever → Order Tip.
- Position the tip section on checkout.
- Enable the “No Thanks” button and styling.
- Configure tip options: label, fixed or percentage values, and default.
Save and test the checkout page to confirm the tip appears before the order total.
Know more: Free + Paid Best WooCommerce Plugins
Tipping for WooCommerce (official WooCommerce extension)
A premium extension by WPSlash. It’s purpose‑built for tipping and donations. Key features are:
- Predefined percent and fixed amount buttons.
- Optional custom tip input.
- Styling options for colors/layout.
- Dashboard reports and analytics for tip metrics.
- Works with WooCommerce block checkout and cart block
Setup Steps:
- Purchase and install the extension via the WooCommerce account.
- Go to WooCommerce → Settings → Tipping.
- Enable tipping and set title text (e.g., “Leave a Tip”).
- Enable percentage buttons and define values (e.g. 10,20,30).
- Choose display mode (percentage, amount, or both).
- Customize styling and save.
- Customers will see the tip section in order review. Reports appear in Analytics → Tips.
Find out: How to Customize Your WooCommerce Checkout Page
WooCommerce Checkout Manager + Fast Cart (Barn2)
Also, a no-code method is using the Barn2’s tools:
- Checkout Manager adds a radio or input field for tips.
- Fast Cart speeds up checkout to reduce abandonment.
Setup Steps:
- Install Checkout Manager Pro.
- In WooCommerce → Checkout → Additional, create a new field.
- Select radio type; label it like “Add a tip”.
- Add options: No tip, 5%, 10%, etc., setting each price.
- Save settings.
- Use the Fast Cart plugin to streamline checkout.
An optional thank‑you note via email or a confirmation page to appreciate tippers.
Also read: How to Create a Headless WooCommerce Site
Best Practices for Effective Tipping Implementation
To ensure the tipping option enhances the customer experience without disrupting conversions or trust, it’s important to follow a few best practices. A well-integrated tip feature should feel like a natural part of the checkout process, not a forced upsell.
Below are key strategies that help you maintain transparency, usability, and goodwill while boosting voluntary contributions.
Make Tipping Clearly Optional
Never make tips mandatory or automatically added to the cart. Instead, clearly label the section as optional with wording like “Would you like to leave a tip?” This maintains customer trust and aligns with ethical checkout practices. Tools like FunnelKit and Orderable support opt-in designs.
Explain the Purpose Briefly
A short, clear explanation can improve tip participation. Use a line such as “Support our team” or “Help us improve our service.” This adds context and increases the likelihood of voluntary contributions. Plugins from FunnelKit, Orderable, and Barn2 allow custom messaging near the tip field.
Offer Multiple Tip Choices
Provide several options like fixed amounts, percentages, and a custom input field. This gives users flexibility and control, encouraging participation. Platforms like WooCommerce, FunnelKit, and Orderable support multi-choice layouts and variable logic.
Ensure Mobile-Friendly Display
A large number of users check out on mobile. Make sure the tip field is responsive, touch-friendly, and easy to locate. Buttons should be easy to tap without crowding the layout.
Show a Thank‑You Message
After a tip is added, display a short confirmation or appreciation message. This could appear on the checkout page, thank-you screen, or confirmation email. It reinforces goodwill and can help build brand loyalty.
Allow Refunds for Tips
Since tips are added as separate fees or line items, customers may occasionally request a refund. Your system should allow partial refunds covering just the tip. This is supported by FunnelKit, Barn2, and WordPress.org plugins.
Check out: How to Power Up Your Business with Smart WooCommerce Integration
Conclusion
Adding a tip option on your WooCommerce checkout offers an opportunity to increase revenue and foster goodwill. You can choose from free solutions or professional tools. Alternatively, you may build optimized funnels via FunnelKit, or customize fields with Barn2.
In each case, ensure tipping is optional, transparent, customizable, and styled to match your brand. Lastly, offer a thank‑you message to appreciate contributors.
By following this guide, you can implement a seamless and conversion‑safe tipping experience in WooCommerce.
FAQs About WooCommerce Checkout Page
How do I add a tip at checkout in WooCommerce?
You can add a tip option in WooCommerce by installing a plugin like WPC Order Tip or FunnelKit. These tools allow you to display a tipping field at checkout without needing custom code.
How do I donate or tip at the cart and checkout in WooCommerce?
To enable donations or tips at the cart and checkout pages, use a plugin that supports custom fields or order bumps. FunnelKit lets you add a tip as a separate product or a one-click offer.
How do I customize my WooCommerce checkout page?
You can customize the WooCommerce checkout using plugins like FunnelKit Funnel Builder or Checkout Field Editor. These tools help you modify layout, fields, and add new sections like tips
What is the Tips plugin for WooCommerce?
Tipping for WooCommerce is a premium plugin designed specifically for tips. It offers percentage or fixed tip buttons, a custom input field, and integration with order analytics.
What is the tip plugin for WordPress?
Plugins like WPC Order Tip and Tipping for WooCommerce are tip plugins for WordPress sites using WooCommerce. They allow seamless tipping without coding.
Can I offer preset tip amounts in WooCommerce?
Yes, many plugins let you offer preset tip buttons (e.g., 5%, 10%, $5). You can also allow users to enter custom amounts.
Is tipping mandatory on WooCommerce checkout?
No, tipping is always optional. Most plugins ensure that customers can skip the tip if they prefer.


