The WordPress block editor, also known as Gutenberg, makes it easy to design pages and posts without writing code. One of its most powerful features is nested blocks, which are blocks placed inside other blocks to create organized, flexible layouts.
If you’ve ever struggled to align text, images, and buttons in one section, nested blocks can solve that. They let you group content together and move it as one unit.
This guide will walk you through the basics, step-by-step instructions, customization tips, and best practices for using nested blocks in WordPress.
An Overview of Blocks in WordPress
The WordPress block editor works by breaking your content into individual, manageable blocks. Each block is self-contained, with its own settings, style options, and unique functionality. This structure makes it easier to design, organize, and update your content without touching a single line of code.
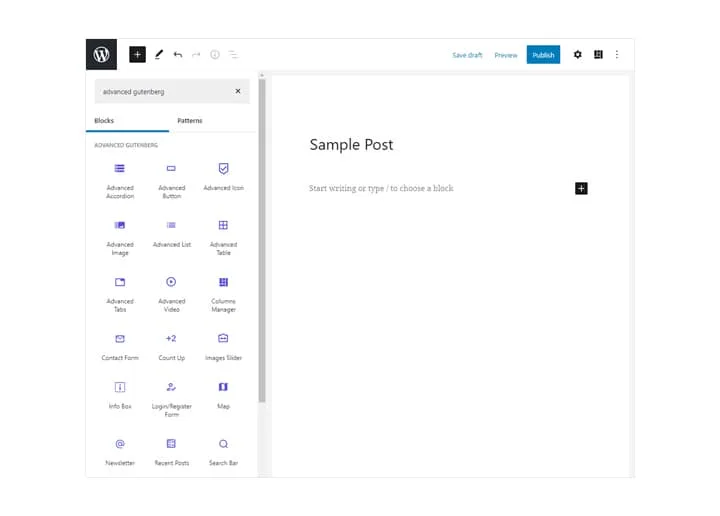
Whether you are building a blog post or designing a landing page, you can combine different block types to create a custom layout. Let’s explore some of the most common blocks you’ll use.
Paragraph Block for Adding Text Content
The Paragraph Block is the default block type. It’s where you add and format your main text content. You can adjust text alignment, font size, and color directly in the block’s settings.
Image Block for Displaying Visuals
The Image Block allows you to upload or select images from your media library. You can adjust size, alignment, add captions, and even link the image to another page or URL.
Heading Block for Structuring Your Content
Use the Heading Block to create section titles and subheadings. This not only makes your content easier to scan but also improves SEO by giving search engines a clear content structure.
Button Block for Driving User Actions
The Button Block is ideal for calls to action such as “Learn More” or “Buy Now.” You can customize button colors, text, and links to match your site’s style.
List Block for Organizing Information
The List Block helps you present information in bullet points or numbered lists. This makes content more readable and easy to follow.
By understanding these basic block types, you’ll have a solid foundation for creating engaging, well-structured pages in WordPress. From here, you can start experimenting with nested blocks to take your layouts even further.
Which is Best: WordPress Block Editor vs Page Builders
Get a High-Performing WordPress Website
Let us build the website you’ve always dreamed of. Explore our service to know more.
Understanding Block Categories
In WordPress, blocks are not just scattered tools but organized into categories. This makes it easier to find what you need and choose the right block for the right purpose.
By understanding these categories, you can plan your layouts more efficiently and keep your design consistent.
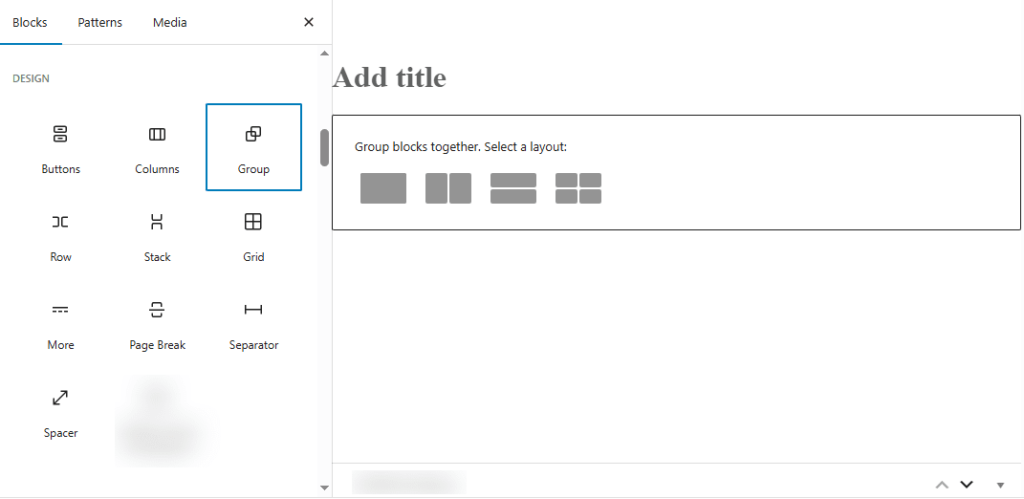
- Layout Blocks for Structuring Your Page: Layout Blocks help you arrange content visually. Examples include Group, Columns, and Spacer blocks. They create the framework for your design, allowing you to position elements exactly where you want them.
- Content Blocks for Displaying Your Information: Content Blocks are where your main content lives. These include Paragraph, Image, and Video blocks. They hold the text, visuals, and media that visitors engage with.
- Widget Blocks for Adding Functional Features: Widget Blocks bring extra functionality to your page. Examples are Search, Calendar, and Latest Posts. They help visitors navigate and interact with your site.
Learn: What is a WordPress Editor
What Are Nested Blocks?
In WordPress, nested blocks are blocks placed inside another block, known as the parent block. This structure allows you to combine multiple elements within a single container, making layouts more organized and visually appealing.
By nesting blocks, you can create sections that are easy to move, style, and maintain.
Here’s why you should use nested blocks:
- To keep related content together to maintain a logical content structure.
- To move multiple elements at once to save time during editing.
- In order to apply consistent styling and change colors, fonts, or spacing for all inner blocks with one adjustment.
Example: Group Block with Multiple Elements
A Group Block can contain a heading, paragraph, and button all together. This keeps related content in one place and makes it easier to apply shared styling, such as a background color or padding.
Example: Columns Block for Side-by-Side Layouts
With a Columns Block, you can place an image on the left and text on the right. This approach is perfect for feature sections, testimonials, or side-by-side comparisons.
Guide to: Create Custom Blocks In WordPress
How to Use Nested Blocks in WordPress (Step-by-Step)
Using nested blocks in WordPress may seem tricky at first, but the process is straightforward once you understand the steps. The goal is to place smaller blocks inside a parent block to create a structured, flexible layout. Follow these steps to get started.
Step 1: Open the Block Editor
First, open the page or post where you want to work. Click the “+” button in the editor to add a new block. This is where you will insert your parent block.
Step 2: Add a Parent Block
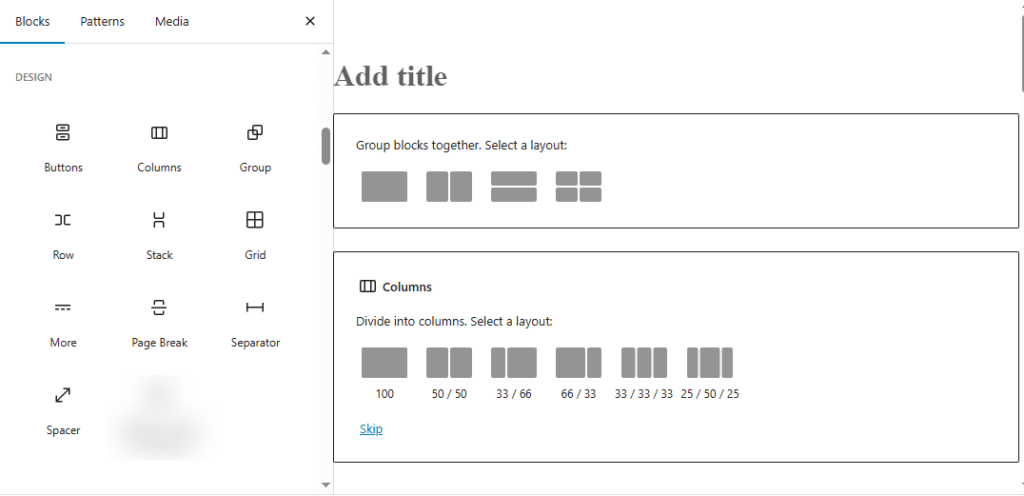
Next, choose a Group or Columns block. These are the most common parent blocks for nesting. They act as containers that hold your inner blocks together.
Step 3: Insert Inner Blocks
Inside the parent block, click the “+” button again. Now, you can add any type of block, such as Paragraph, Image, or Button, to build your content.
Step 4: Rearrange Inner Blocks
To adjust the order, use the drag-and-drop handle or the up/down arrows in the block toolbar. This lets you quickly reorganize your layout without starting over.
Step 5: Customize Styles
Finally, select the parent block to apply styling. Change the background color, text color, spacing, or borders as needed. All changes will automatically apply to the inner blocks, ensuring consistent design.
Customization is where nested blocks shine. You can:
- Apply a common background to all inner elements.
- Set padding and margins for better spacing.
- Add custom CSS classes for advanced styling.
- Adjust responsive behavior for mobile screens.
Tip: Always check how nested blocks look on mobile by switching to the Mobile Preview in the editor.
By following these steps, you can create nested block layouts that are visually appealing, easy to edit, and perfect for responsive design. Once you master these basics, you can explore more advanced customization techniques.
How to Configure WordPress Nested Block Settings?
Once you’ve created your nested blocks, you can fine-tune them for a more polished and consistent design.
WordPress provides several settings that allow you to control the appearance and functionality of both parent and inner blocks. Adjusting these options helps you maintain a cohesive look across your site.
- Select the Parent Block for Global Changes: To make edits that affect all inner blocks at once, first select the parent block. From here, you can adjust background colors, spacing, alignment, and other style settings that will apply to every nested block inside.
- Use Advanced Settings for Custom CSS: If you need more control, open the Advanced Settings panel. Here, you can assign custom CSS classes to your block. This allows you to style your content beyond the default editor options.
- Explore Block Styles for Quick Design Tweaks: WordPress offers Block Styles, which are predefined design variations. These can instantly change the look of your block without requiring manual adjustments, making it easy to test different visual options.
Configuring these settings ensures that your nested blocks are not only functional but also visually consistent across your website.
Explore: Best WordPress Block Themes
Steps to Create Complex Layouts with Nested Blocks
Nested blocks are a powerful way to build professional, multi-section layouts without coding.
By combining different block types inside a parent block, you can design pages that look polished and remain easy to edit. They work especially well for multi-column layouts, hero sections, and feature lists.
Step 1: Add a Columns Block
Begin by inserting a Columns Block into your page. For this example, choose the three-column layout option. This will act as the main container for your feature section.
Step 2: Insert Content into Each Column
Inside each column, add an Image Block at the top for visuals. Below the image, place a Heading Block for the feature title, followed by a Paragraph Block to describe it. This creates a consistent structure across all columns.
Step 3: Style the Parent Block
Select the Columns Block (parent block) and adjust spacing, background color, and alignment to achieve a uniform look. You can also add padding to ensure your content has room to breathe.
By following this method, you can create eye-catching, well-structured layouts that enhance both usability and design.
Also read: How to Build Blocks with Bento in WordPress
How to Use Blocks Within Other Blocks?
While Group and Columns blocks are the most common parent blocks in WordPress, there are several other blocks that also allow nesting. These special blocks let you combine multiple elements in creative ways, giving you more flexibility in your page designs.
- Cover Block: Text or Buttons Over an Image: The Cover Block lets you place text, headings, or buttons over a background image or color. This is perfect for hero banners or section headers that need visual impact. You can also adjust overlay opacity for better readability.
- Media & Text Block: Side-by-Side Content: The Media & Text Block is designed for layouts where an image or video appears beside a block of text. You can choose which side the media appears on, making it ideal for feature descriptions or service highlights.
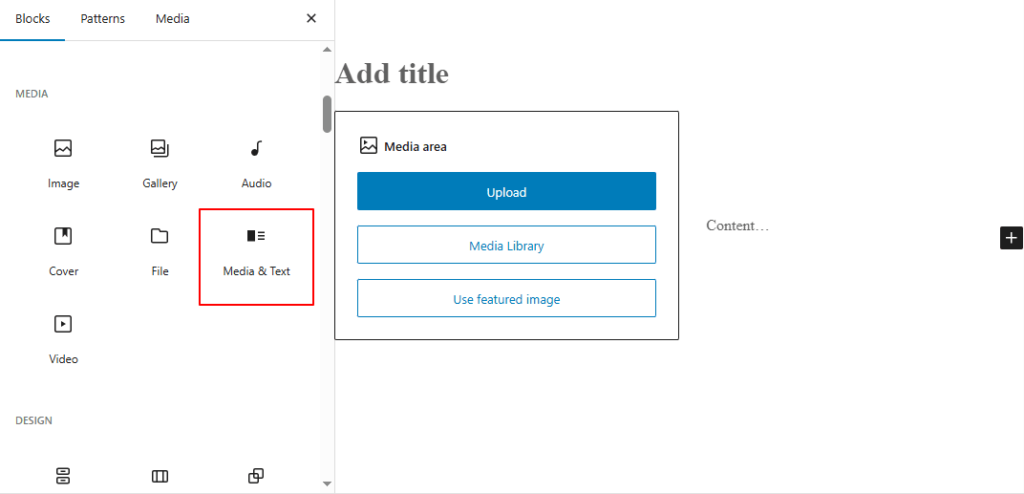
- Buttons Block: Multiple Links Together: The Buttons Block allows you to add two or more button links side-by-side. This is useful for providing multiple calls-to-action in one section, such as “Sign Up” and “Learn More.”
Using these block types expands your design options, allowing you to nest and combine elements in visually appealing ways.
Know more: What Are WordPress Block Patterns
Tips to Master Nested Blocks in WordPress
Nested blocks can take your WordPress layouts from basic to professional. Once you’re comfortable with adding and customizing them, you can start exploring advanced techniques, best practices, and plugin enhancements to create even more polished designs.
Mastering these tips will help you save time, maintain consistency, and unlock the full potential of the block editor.
Advanced Techniques with Nested Blocks
After learning the basics, you can push nested blocks further with advanced layout strategies. For example:
- Multi-Level Nesting: For highly structured sections, place nested blocks inside other nested blocks. For instance, you could have a Group block containing multiple Columns blocks, each with its own inner content.
- Reusable Blocks: Convert frequently used nested layouts into reusable blocks so you can insert them across multiple pages. This is especially helpful for things like testimonials, pricing tables, or call-to-action sections.
- Custom CSS Styling: Add custom classes to your parent block and write CSS rules to control spacing, colors, or animations more precisely.
These techniques allow you to create layouts that are both visually unique and easy to manage across your site.
Beginner’s Guide: WordPress Full Site Editing
Content Creation with Nested Blocks
Nested blocks aren’t just for design; they also make content creation more organized and efficient. Here’s how:
- Grouping Related Content: Keep headings, text, and images for a single section together so they stay aligned when moved.
- Reusable Layouts for Content Types: To maintain consistency, use the same nested block structure for all blog post introductions or service descriptions.
- Faster Updates: When content changes, you can edit one parent block and instantly apply updates to all inner blocks.
With these methods, you can quickly produce professional-looking content layouts, without rebuilding sections from scratch.
Related: How to Hide or Show Block Content in WordPress
Block Plugins and Development
If you want to go beyond the default options, consider using WordPress block plugins. Many plugins add enhanced layout and styling capabilities for nested blocks:
- Kadence Blocks offers advanced row layouts, custom spacing, and responsive controls.
- GenerateBlocks are lightweight and ideal for building highly customizable, nested layouts.
- Stackable includes ready-made block patterns that use nested structures.
For developers, WordPress provides the Block API and the InnerBlocks component to create custom block types. This allows you to build unique parent and child block combinations, package them as plugins, and reuse them across projects.
Whether you use prebuilt plugins or develop your own, these tools can significantly expand your design flexibility.
Also read: How to Create WordPress Website Wireframes
Best Practices for Using Nested Blocks
While nested blocks are powerful, it’s important to use them strategically. Follow these best practices to keep your layouts clean and manageable:
- Keep It Simple: Avoid unnecessary nesting, as too many layers can make editing slow and confusing.
- Plan Your Layout: Sketch your section layout before building it in the editor. This reduces the need for major rearrangements later.
- Maintain Consistency: Apply consistent padding, margin, and color schemes across similar sections for a cohesive design.
- Test Responsiveness: Always preview your nested blocks on mobile and tablet views to ensure they adapt well to smaller screens.
- Use Parent Styles Wisely: Make changes at the parent block level whenever possible to ensure all inner blocks match the intended style.
By following these tips, you can ensure your nested blocks remain functional, visually appealing, and user-friendly.
Ultimate Guide: Elementor to Gutenberg Conversion
In Summary
Nested blocks in WordPress give beginners the power to create professional, flexible layouts without coding. By understanding parent and inner blocks, using Groups and Columns effectively, and customizing styles, you can design visually appealing pages that are easy to maintain.
Whether you’re building a blog post layout or a full landing page, nested blocks let you organize content cleanly, apply consistent styling, and make quick updates in the future.
So, start experimenting today, and you’ll find they’re one of the most useful tools in the WordPress block editor.
FAQs on WordPress Nested Blocks
Why is understanding nested blocks important?
Understanding nested blocks helps you build visually appealing designs, manage individual elements efficiently, and streamline your site editor workflow for a better WordPress site experience.
How do you nest blocks in WordPress?
In the Gutenberg block editor, you can nest blocks by adding a Group or Column Block as a single parent block, then inserting inner blocks like paragraph blocks, image blocks, or button blocks inside. This creates nested content for more visually appealing and organized layouts.
What does it mean to have a nested column in WordPress?
A nested column means placing a column block inside another column, allowing multiple blocks or child blocks within the same section for dynamic layouts and creating complex designs without custom code.
How do you arrange blocks in WordPress?
You can arrange individual blocks using the drag-and-drop handle or up/down arrows in the toolbar at the top left corner of the block. This works for both existing individual blocks and new ones you add.
How do you use content blocks in WordPress?
To use content blocks, click the add block icon, choose from heading blocks, paragraph blocks, image blocks, or button blocks, and insert them into your layout to create content that matches your WordPress theme.
What are parent block settings?
Parent block settings control styling for all the blocks inside a container. Changing one setting updates every individual block inside the one block structure.
Can block plugins help with nested blocks?
Yes. A block plugin can add custom blocks, improve performance optimization, and offer more edit component controls for the content creation process.
