So, you have got a brilliant business idea, the passion to make it happen, but setting up a website with elaborate WordPress development feels like a maze of confusing tech terms and overwhelming options. Choosing the right domain name, finding reliable hosting, customizing website design for your entrepreneur website – it is enough to make any aspiring entrepreneur’s head spin! Take a deep breath, because this guide is here to simplify the process of launching your entrepreneurial website using WordPress.
We will break it down step-by-step, from securing that perfect online identity to finally hitting “publish” on your labor of love. No more stressing over hosting plans that don’t fit your needs or wrestling with complicated code to make your site look sharp. With WordPress’s user-friendly platform, you can focus on what matters most for your entrepreneur website: sharing your vision with the world and turning your entrepreneurial dreams into a thriving online reality.
Contents
ToggleStep 1: Selecting a Domain Name – Your Online Identity

Your domain name is like your virtual address – it is how people will find your entrepreneur website on the vast expanse of the internet. Here are a few tips to help you choose a domain name that rocks:
- Keep it short, sweet, and easy to remember (think catchy nicknames, not long-winded ones)
- Make sure it is relevant to your business (no random gibberish, please!)
- Sprinkle in some primary keywords (help those search engines out)
- Go for something brandable and catchy (you want people to remember you, right?)
Once you have brainstormed some potential domain names for your entrepreneurial website, it is time to check if they are available for registration. Most WordPress hosting providers offer domain registration services, making it a breeze to secure your perfect online identity.
Here is how:
- Visit your preferred domain registrar’s website
- Enter your desired domain name in the search box
- Check availability and pricing options
- If available, proceed to register and purchase the domain
Read More: Top Dedicated Server Providers
Pro Tip: Consider getting a domain name for your entrepreneur website on WordPress that is easy to spell and pronounce. You do not want your customers stumbling over their words every time they share your website!
Need to Set Up an Entrepreneurial Website Fast?
We can set it up in record time without compromising any vital features of your planned site! Get our WordPress QuickSite services starting at just $699!
Step 2: Getting WordPress Hosting – Your Online Home
Think of web hosting as the landlord of your online digs. It is where your website will live and thrive. WordPress, being the versatile platform it is, can play nice with different types of hosting options:
- Shared hosting (Compact with limited options)
- In this, multiple websites share server resources
- It is ideal for small to medium-sized sites
- You will find limited resources and customization options
Find shared hosting with Hostinger plans.
- VPS hosting (a little more space and privacy)
- Virtual Private Server with dedicated resources
- More control and flexibility than shared hosting
- Suitable for growing websites with higher traffic
Get WP Hosting for your business to enjoy automated updates and bulletproof security.
- Managed WordPress hosting (the butler of hosting services)
- Optimized for WordPress performance and security
- Automatic updates and backups
- Often includes additional features like caching and staging environments
Read a Relevant Review: WP Engine Unveiled: A Comprehensive Hosting Review
We strongly recommend DreamHost as a hosting partner for your entrepreneur website, because it certainly ticks boxes for the most important criteria:
- Reliability: you don’t want your site to go MIA),
- Speed: nobody likes a sluggish website), and
- Top-notch WordPress support: Because you might need a helping hand.
Step 3: Installing WordPress – The Crux of the Process

Okay, let’s get our hands dirty. Most web hosts make it super easy to install WordPress with just a few clicks.
Here is a quick rundown of the process:
- Head over to your hosting account’s control panel (usually cPanel)
- Locate the Install WordPress option (or something similar)
- Configure your database settings
- Enter a database name
- Create a database user and password
- Provide your site details (title, admin credentials, etc.)
- Choose a user-friendly site title
- Set up your admin username and password for your entrepreneur website (make it strong!)
- And voila! You should now have access to your shiny new WordPress admin dashboard.
Pro Tip: While setting up your admin credentials, choose a strong password and keep it safe. You don’t want any unwanted guests crashing your online party.
Keep Reading: 30+ Actionable Ways To Speed Up WordPress Admin
Step 4: Setting Up Your Website – Let’s Get Organized
Now that you have got WordPress installed, it is time to roll up your sleeves and get your entrepreneur website in tip-top shape:
- Update your general settings (time zone, date format, etc.)
- Go to Settings > General and adjust the necessary options
- Configure your permalink structure (user-friendly URLs are a must)
- Visit Settings > Permalinks and choose a suitable permalink structure (e.g., post name)
Read More: How To Redirect WordPress URL With & Without Plugin?
- Enable SSL for that super-secure green padlock
- Install and activate a free SSL certificate from your hosting provider or a service like Let’s Encrypt
- Install essential plugins for security, SEO, and other must-have features
- Browse the WordPress plugin directory or recommendations from reputable sources
- Install and activate plugins like Wordfence (security), AIOSEO (SEO), and Jetpack (utilities)
Pro Tip: Don’t go overboard with plugins on your entrepreneur website! Too many can slow down your site and cause compatibility issues. Start with the essentials and add more as needed.
Read More: Free WordPress Hosting Providers
Step 5: Customizing Your Theme and Design – Express Yourself

Your entrepreneur website’s design is like your virtual outfit – you want to look sharp and memorable. WordPress makes it easy to customize your site’s appearance without being a coding wizard:
- Browse and install a theme that fits your brand (free or premium, the choice is yours)
- Visit Appearance > Themes and explore the available options
- Preview themes before installation to ensure they match your brand
- Customize theme settings like colors, fonts, and layout
- Most themes come with customization options under Appearance > Customize
- Adjust colors, typography, and layout settings to your liking
- Upload your logo and other branding elements
- Go to Appearance > Customize or Appearance > Header to upload your logo
- Add other branding elements like favicons and social media icons
- Tweak the design until it feels like a perfect fit
- Experiment with different layout and design options
- Consider hiring a designer or developer for more extensive customizations
More Resources: WP Themes, Builders and Plugins
Pro Tip: Look for responsive themes that adapt seamlessly to different screen sizes. Mobile-friendliness is a must in present scene.
Need to Up Your Design Game for Higher Level of User Engagement?
We hear you! For just $999, our dedicated team will create a customized web design tailored for your unique site, with user flow and customer engagement focus.
Step 6: Importing Content – Bring Your Ideas to Life
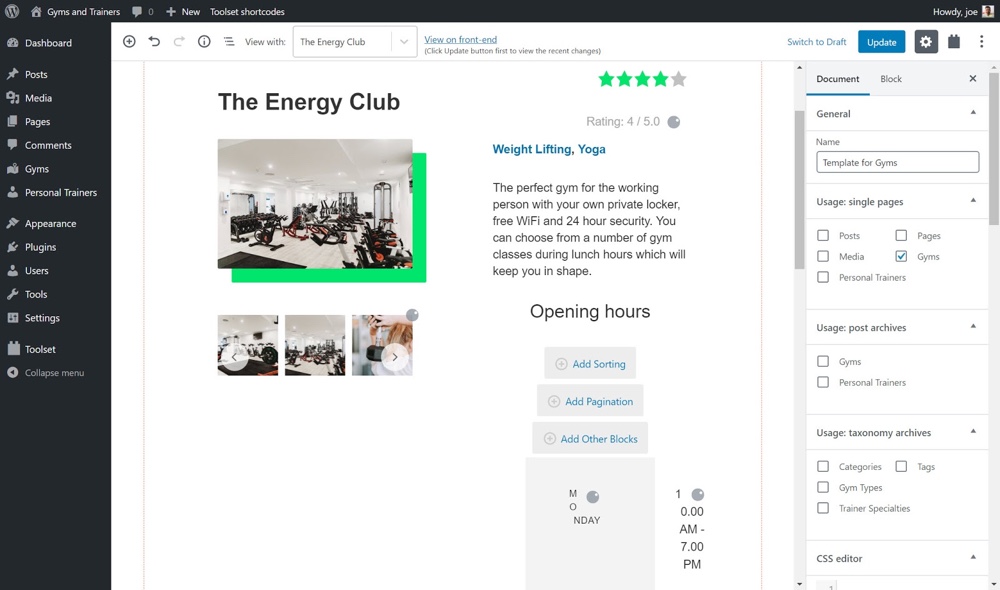
Got existing content for your new entrepreneur website from another platform or website? No problem! WordPress makes it easy to import your precious words and visuals:
- Use plugins like All-in-One WP Migration to migrate entire sites
- Install and activate the plugin
- Follow the prompts to export your existing site and import it to your new WordPress site
- Import blog posts and pages from other platforms (Word docs, HTML files, etc.)
- Go to Tools > Import and choose the appropriate importer (e.g., WordPress, RSS, etc.)
- Follow the instructions to import your content
- Upload and organize your media files (images, videos, and more)
- Visit Media > Library to upload and manage your media files
- Organize files into appropriate folders or categories for easy access
Pro Tip: Optimize your image files for better performance. Large, uncompressed images can slow down your site’s loading speed. Use tools like Imagify or Smush to compress images without sacrificing quality.
Read More: Best WordPress Image Optimization Plugins (Free)
Step 7: Promoting and Launching Your Site
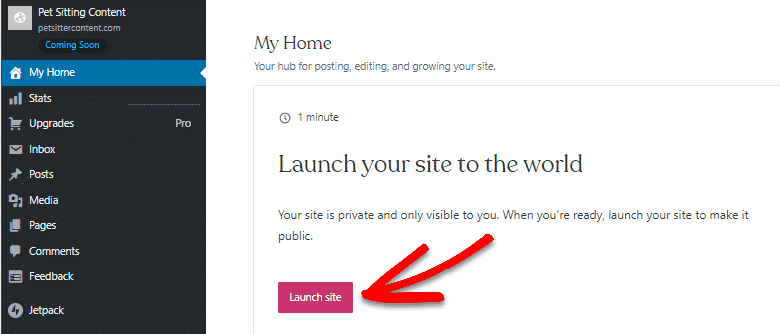
You have poured your heart and soul into building your website – now it’s time to show it off to the world! But before you hit the launch button:
- Test your site’s functionality (broken links and bugs are so last season)
- Use online tools like the W3C Markup Validation Service to check for errors on your entrepreneur website
- Test your site on different devices and browsers to ensure compatibility
- Proofread your content (typos can be a real buzzkill)
- Have someone else review your content for spelling and grammar mistakes
- Consider using tools grammar checker tools like Wordvice, Grammarly or the built-in proofreading features in WordPress
- Submit your site to search engines (hello, Google!)
- Go to Google Search Console and submit your sitemap for indexing
- Ping other search engines like Bing and Yahoo for faster crawling
Once you have checked all the boxes, it is showtime!
Leverage your email lists, social media channels, and (if you’re feeling fancy) some paid advertising to spread the word.
Read More: Free Broken Link Checker Tool
Parting Thoughts: Sustaining and Growing Your WordPress Site
Launching your website is just the beginning of your online adventure. It’s a milestone worth celebrating, but the real work starts now – keeping your site fresh, engaging, and constantly evolving.
Here are some tips to help you stay on top of your game:
Maintaining regular updates is crucial for both security and functionality. WordPress, themes, and plugins are constantly being improved, and staying up-to-date with regular WordPress maintenance service ensures your site is running smoothly and safely. Enable automatic updates for minor releases to keep things ticking over, but when it comes to major updates for your entrepreneur website, it is best to test them on a staging site first to catch any compatibility issues or bugs.
Content freshness is the lifeblood of a successful website. Consistently updating your blog and pages with new, relevant content will keep your audience hooked and coming back for more. Develop a content calendar to plan and stick to a regular publishing schedule. And don’t forget to repurpose and update your existing content – a little refresh can breathe new life into your older posts and pages.

Enhancing user experience should be a top priority. After all, a website that looks great and functions smoothly on all devices, with intuitive navigation, is more likely to keep visitors engaged and coming back. Use tools like Google’s Mobile-Friendly Test to check for responsiveness issues, and optimize page load times by minimizing HTTP requests and leveraging caching techniques.
Speaking of keeping visitors engaged, focusing on SEO is a must. Optimize content on the entrepreneur website with keywords to improve your search engine rankings, and stay on top of the latest SEO trends. Conduct thorough keyword research to ensure you’re targeting the right phrases, and engage in link building through guest posting, broken link building, and outreach to boost your authority and visibility.
Remember, launching your website is just the first step in a long and exciting journey. Embrace the process of continuous improvement, stay agile and adaptable, and never stop striving to deliver an exceptional experience for your audience. With a little elbow grease and a whole lot of passion, your online empire will continue to thrive and grow.
