Creating a WordPress website starts with one key step that many skip: wireframing. Think of it like a blueprint. Before you dive into design or development, you need a visual roadmap. Wireframes help you plan your website’s layout, structure, and functionality. In this guide, we’ll cover everything you need to know about creating WordPress website wireframes, from tools to techniques, with real examples and practical tips.
What is a Website Wireframe?
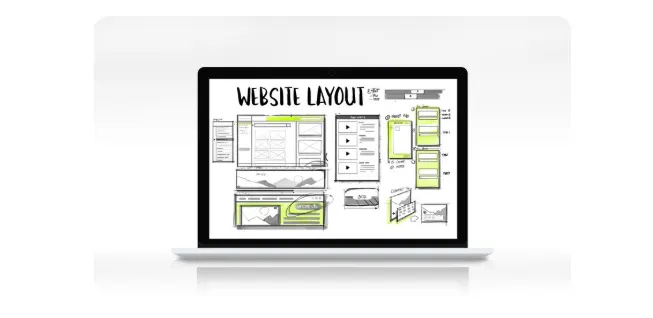
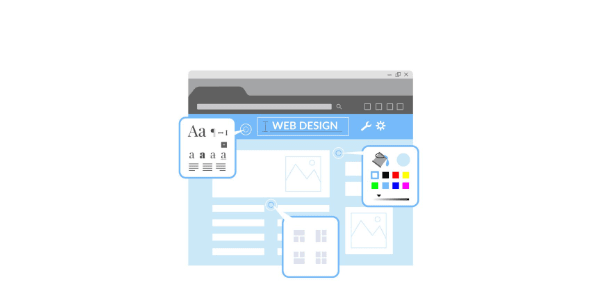
A wireframe is a low-fidelity visual guide that represents the structure of a website. It outlines where key elements like headers, menus, images, buttons, and text will go without focusing on colors or graphics.

You can think of a wireframe as a skeleton of your site layout. It’s usually black and white and made up of simple shapes, lines, and placeholders. Its job is to show how content is arranged and how users will interact with it.
Why is Wireframing Essential for WordPress Websites?
With WordPress offering countless themes, plugins, and design possibilities, it’s easy to lose direction. Wireframes bring clarity and structure, helping you build smarter, not harder. Here’s why they matter:
- Visual Planning: Wireframes let you map out the layout visually before diving into development. This helps identify design needs early and aligns the team on a shared vision.
- Faster Development: By providing a clear blueprint, wireframes reduce guesswork. Designers and developers can work more efficiently, minimizing revisions and delays.
- Better User Experience (UX): You can spot potential usability issues and test user journeys early. This ensures a smoother experience for your visitors from the start.
- Stronger Content Strategy: Planning layout first gives clarity on what content goes where. This leads to better-structured and purpose-driven content; no filler.
In short, wireframes bridge the gap between ideas and execution. They set the foundation for a WordPress website that’s functional, user-friendly, and built with purpose.
Turn Your Wireframe Into a High-Impact Website
Whether you’re starting with a rough sketch or a complete wireframe, our team transforms concepts into fully functional, conversion-focused WordPress websites.
Best Practices for WordPress Website Wireframes
Creating wireframes is a great start, but doing it right makes all the difference. Following a few key best practices ensures your wireframes are both functional and future-proof. Here’s how to get the most out of the process:
- Stay Low-Fidelity at First: Start with simple sketches or grayscale layouts. Skip the design details like fonts or colors and focus purely on structure and flow.
- Think Like a User: Put yourself in your visitor’s shoes. Is the navigation easy to follow? Are CTAs placed logically? Design with usability in mind from the start.
- Keep it Scalable: Your website will likely grow. So, leave room for expanding content like more blog categories, services, or menu links.
- Match WordPress Capabilities: Align your wireframes with what your WordPress theme or builder can realistically support. This avoids rework and keeps your designs practical.
- Use Placeholder Text with Purpose: Instead of generic filler, use descriptive examples. It helps stakeholders visualize content flow and improves content planning down the line.
By sticking to these practices, your wireframes won’t just look good; they’ll be a valuable tool throughout your WordPress development journey.
Explore: How to Create a Mockup Website for a Client
Steps to Create WordPress Website Wireframes
Creating wireframes isn’t just about drawing boxes; it’s a strategic process. Each step plays a role in building a WordPress site that meets user needs and business goals. Here’s how to do it right:
Step 1: Define Your Website Goals
Every successful WordPress website begins with a clear purpose. Before you start wireframing, it’s essential to understand what your site is meant to achieve. This step sets the direction for your layout, content, and user flow.

- Identify the Website’s Main Purpose: Is your site a blog, online store, portfolio, or service-based business? Defining this helps you prioritize the right elements in your wireframe.
- Clarify Your Primary Goal: Do you want users to book a service, make a purchase, or subscribe to a newsletter? Your main goal should guide your layout and calls to action.
- Know Your Target Audience: Understanding who your visitors are shapes everything from navigation to messaging. Think about their needs, expectations, and browsing behavior.
- Determine Key User Actions: List the specific actions you want users to take like contacting you, downloading a guide, or reading a blog post. This clarity helps structure each page purposefully.
Discover: Web Design Process to Create an Awesome Website
Step 2: List the Core Pages You Need
Before wireframing, it’s important to define the structure of your website. This starts with identifying all the essential pages your WordPress site will include. A clear sitemap helps you organize content and plan user navigation effectively.
Start with the Standard Pages: Most websites need a few core pages:
- Homepage: Your main entry point, introducing who you are and what you offer.
- About Us: Share your story, mission, and team.
- Services or Products: Highlights what you sell or offer.
- Blog or Resources: Provides valuable content to engage and educate users.
- Contact Us: Lets users reach out easily through forms or direct contact info.
Add Niche-Specific Pages: Depending on your business model, you may also need:
- Landing Pages: For promotions, lead capture, or campaigns.
- FAQs: To address common questions and reduce support time.
- Case Studies or Testimonials: For building trust and social proof.
- Portfolio: Especially useful for creative professionals or agencies.
Create a Simple Sitemap: List or map out all your pages visually. This helps you understand how content will flow and where users should navigate next.
Step 3: Choose the Right Wireframing Tool
The tool you choose for wireframing can impact how efficiently you work. While pen and paper are great for quick sketches, digital tools offer more flexibility and collaboration options. The right tool depends on your needs, skill level, and workflow. Here are some wireframe tools:
- Figma is a browser-based design tool that’s ideal for teams. It allows real-time collaboration, easy sharing, and a rich set of UI components to speed up wireframing.
- Perfect for Windows and Mac users, Adobe XD offers a free starter plan and works offline. It’s user-friendly, integrates well with other Adobe tools, and supports interactive prototypes.
- If you prefer low-fidelity wireframes, Balsamiq is a great choice. Its simple, sketch-like interface keeps the focus on layout and structure, not design.
- Whimsical offers a drag-and-drop interface that’s intuitive for beginners. It combines wireframes, flowcharts, and notes, which is ideal for planning and presentation.
- Moqups is a web-based tool designed for fast, responsive wireframing. It supports collaboration and is easy to use for both designers and non-designers.
Choose a tool that fits your comfort level and project scope. For team projects, prioritize platforms with real-time collaboration features.
Simple Steps: How to Convert Design Prototype to WordPress
Step 4: Start with the Homepage Wireframe
Begin with the homepage because it sets the tone for the entire site. Break it down into logical sections:

- Header: Include your logo, main navigation menu, and possibly a standout CTA button like “Get a Quote” or “Contact Us.”
- Hero Section: Use a bold headline, supporting subheadline, and a clear CTA. This area should immediately convey your value.
- Key Features or Services: Showcase your top offerings in a grid or list format to help users quickly understand what you provide.
- About Preview: Add a short intro about your business with a link to the full About page for deeper engagement.
- Testimonials or Social Proof: Feature client quotes or reviews to build trust and credibility.
- Blog Preview: Display recent posts or insights to keep content fresh and engaging.
- Contact CTA: Prompt users to take action, such as filling out a form or scheduling a call.
- Footer: Include essential links, contact info, social icons, and newsletter signup.
Keep the layout simple. Use boxes and lines to represent sections. Label each area clearly (e.g., “Headline Here”, “Image Placeholder”, “CTA Button”).
Check out: Top Product Design Tools Every Designer Should Have
Step 5: Create Wireframes for Other Pages
After the homepage, move on to internal pages. Here’s how to structure them:
- About Page: Mission statement, team intro, timeline or company story, photos or icons, and contact link.
- Services/Product Page: Service name or product title, short description, features or benefits list, pricing (if applicable), and call-to-action button.
- Blog Page: Post previews (thumbnail, title, excerpt), categories or filters, sidebar (optional), and pagination or load more.
- Contact Page: Contact form, Google map (if local business), social media links, and phone/email info.
Each wireframe should follow a consistent structure to maintain a unified user experience.
Also read: Website Design Guide for Professional Web Designers
Step 6: Use Annotations and Notes
Wireframes aren’t always self-explanatory, especially when shared with developers, designers, or clients. Adding annotations ensures everyone understands the purpose and function of each element. These notes bridge the gap between ideas and implementation.
- Clarify Functionality: Use annotations to explain how elements should behave. For example, note that a specific CTA button links to the contact page or that a slider auto-rotates every five seconds.
- Specify Form Details: Clearly outline what fields are needed in forms. Mention if the form should collect name, email, phone number, or any other details.
- Define Editable Areas: Highlight which parts of the layout should be editable in WordPress. This helps developers know what content needs to be dynamic versus static.
By including concise, relevant notes, you avoid confusion and reduce the risk of rework during the design or development stages.
Complete Guide: WordPress Project Front Page
Step 7: Create Responsive Wireframes
Today’s users access websites from multiple devices, so your wireframes must reflect that flexibility.
Designing with responsiveness in mind ensures a seamless experience across desktops, tablets, and smartphones. Most wireframing tools support these views, making it easy to adapt layouts.
- Plan for Multiple Screen Sizes: Use your wireframing tool’s device preview modes to switch between desktop, tablet, and mobile. This helps you visualize how your layout adjusts across breakpoints.
- Prioritize Mobile-First Design: Start with the smallest screen size and build upward. Stack elements vertically, simplify layouts, and make key actions easily tappable.
- Adjust Navigation and Spacing: On smaller screens, replace traditional menus with hamburger icons or collapsible menus. Also, reduce unnecessary whitespace and focus on clear, concise content blocks.
By wireframing responsively, you ensure your WordPress site delivers a consistent and user-friendly experience on every device.
Learn more: Best Responsive Website Design Ideas
Step 8: Review, Get Feedback, and Refine
Once you’ve outlined all key pages, take a step back and evaluate the work. Gathering feedback early helps identify gaps, align expectations, and avoid expensive design changes later in the process.
- Involve Key Stakeholders: Share your wireframes with clients or decision-makers to ensure the layout supports business goals and user needs.
- Collaborate with Designers and Developers: Designers can spot visual inconsistencies, while developers can flag technical limitations. Their input helps create more practical and polished layouts.
- Get Input from Marketers and Writers: Content teams can ensure the layout supports messaging and SEO best practices. They may also suggest better ways to present calls to action or headings.
- Refine Based on Feedback: Use the feedback to adjust sections, improve usability, or clarify annotations. Small changes now can save time and rework during development.
Further reading: Fluid Design in Web Development
Bonus: Translating Wireframes into WordPress Designs
Once your wireframes are finalized, the next step is bringing them to life within WordPress. This process involves using themes, page builders, and block-based editors to recreate your planned layout while keeping the user experience and functionality intact.
- Use WordPress Themes and Blocks: Start by selecting a theme that aligns with your wireframe structure. Builders like Kadence Blocks, Elementor, or Gutenberg help convert your wireframes into real web layouts with minimal coding.
- Import or Rebuild Your Layout: Some wireframing tools allow direct import into WordPress, while others require manual reconstruction. Use your wireframe as a reference and build section by section using blocks and widgets.
- Consider User Interaction: Think beyond design. Consider how users will interact with menus, buttons, and forms. Ensure the design supports intuitive navigation and smooth functionality through the WordPress dashboard.
WordPress Web Design Agency
Working with a WordPress web design agency can speed up the build process and improve quality. But success depends on clear communication.
- Align on Project Goals: Before starting, share your wireframes and define the site’s purpose, target audience, and key actions.
- Collaborate on Design Decisions: Use wireframes to guide discussions and keep the design aligned with the original vision.
- Focus on Usability: A good agency will refine your wireframes and turn them into designs that are both attractive and user-friendly.
Hiring a WordPress Developer
Hiring a WordPress web developer ensures your wireframes are translated into responsive, functional websites.
- Define Clear Requirements: Share your wireframes and project goals upfront. This helps the developer understand layout expectations and required functionality.
- Choose Developers with WordPress Experience: Look for someone familiar with block editors, custom themes, or WooCommerce, depending on your needs.
- Keep the User in Mind: Ensure the final site is easy to manage via the WordPress backend and offers a seamless experience for visitors.
Final Thoughts
Creating WordPress website wireframes might seem like an extra step, but it’s a powerful tool that sets the stage for success. By wireframing your WordPress site first, you save time, reduce confusion, and create a better user experience.
You don’t need to be a designer to create a wireframe. You just need a clear goal, a good plan, and the right tools. Whether you’re building a site for yourself or a client, wireframes help you visualize and refine before investing in full-scale design or development.
Start with simple sketches, validate your ideas, and iterate your way to a clean, functional WordPress website.
WordPress Website Wireframes FAQs
How do I create a wireframe for my website?
To create a wireframe for your website, start by outlining your content, identifying key pages and design elements, and sketching simple layout options. Use wireframing or prototyping tools like Figma, Balsamiq, or Adobe XD to design your first wireframe with a focus on structure, not visual elements. This helps define content placement and information hierarchy before moving to the final design.
How to create a wireframe in WordPress?
WordPress itself doesn’t offer built-in wireframing tools, but you can use WordPress blocks and visual page builders like Elementor or Kadence Blocks to replicate a wireframe layout. Alternatively, create wireframes using design software first, then translate the structure into your WordPress site using available widgets and block elements.
How to convert a website into a wireframe?
To convert a website into a wireframe, analyze the existing content and layout, then replicate it using a wireframing tool. Strip away colors and images to focus on structural elements like page layout, navigation, and CTAs. This process helps in redesigns and ensures a clearer wireframing stage.
Can ChatGPT create wireframes?
While ChatGPT can’t generate visual wireframes directly, it can guide you through the wireframing process, suggest layout options, and help organize wireframe elements. You can also ask for a detailed guide, content structure, or even a text-based mockup for your web page.
What are wireframe templates, and when should I use them?
Wireframe templates are pre-designed layout structures that speed up the wireframing process. Use them in the early design stages to explore layout options, maintain consistency, and streamline the creation of high fidelity wireframes later on.
What is the difference between a wireframe and a mockup?
A wireframe is a low-fidelity visual representation that outlines the basic structure and information architecture of a web page. A wireframe mockup is more detailed, often showing actual images, fonts, and color schemes; closer to the finished product or final design.
Why is wireframing important in the web design process?
Wireframing helps organize the page layout, define how users interact with content, and structure the information hierarchy early on. It’s a critical step in transforming initial concepts into a functional final product without unnecessary revisions.


