Have you ever noticed how some website addresses start with “www” while others don’t? If you’re running a WordPress site, you might be wondering if you should keep or remove www. It’s not just about looks – there are good reasons to consider dropping the “www” from your site’s URL.
Why bother removing “www”? For starters, it makes your web address shorter and easier for people to type and remember. Implementing it during WordPress development can be especially helpful if you’re promoting your site verbally or in print. A cleaner URL can also look more modern and professional in some cases.
But it’s not always smooth sailing. Removing “www” can sometimes cause issues with your site’s setup, especially if you’re not careful. You might run into problems with SSL certificates, email deliverability, or even how search engines view your site.
Read our guide to go through the most effective processes to achieve this. We’ll look at when removing “www” makes sense and the potential hiccups you might face.
Benefits of Websites with www Removed from URL
Ready to give your WordPress site a sleek makeover? Removing “www” from your URL might be just the ticket. Let’s explore how this small change can make a big difference.
Simplified URL: Less is often more in web design. Without “www”, your site address becomes shorter and snappier. It’s easier for people to type and share, especially when they’re in a hurry or on mobile devices.
Branding Consistency: A cleaner URL helps keep your brand look uniform everywhere. Whether it’s on a business card or a billboard, your web address will always look the same – neat and professional.
Read More: URL Blacklisting: How to Fix and Prevent It?
Improved User Experience: Shorter URLs are a win for mobile users. They fit better on small screens and are less likely to get cut off or wrap awkwardly. It’s a small touch that can make your site feel more polished.
Technical Advantages: In some cases, dropping “www” can speed things up a bit. It might shave off a tiny bit of load time by reducing DNS lookups. Plus, it can sometimes make setting up SSL certificates a bit simpler.
SEO Benefits: Search engines prefer consistency. By sticking to one URL format, you avoid potential duplicate content issues. This can give your SEO efforts a small boost.
Modern Web Practices: Many big websites have already ditched “www”. Following suit can make your site feel more current and tech-savvy. It’s a subtle way to show you’re keeping up with web trends.
Custom Subdomains: If you use subdomains like blog.yoursite.com, removing “www” from your main domain helps these custom addresses stand out more clearly.
Not a Fan of Lengthy URLs? Remove the www Part!
Our development team holds specialized knowledge and years of experience aligning URLs with brand vision for business websites. Hire our web development servoices to take care of specific requirements just like these!
Removing www from WordPress Dashboard
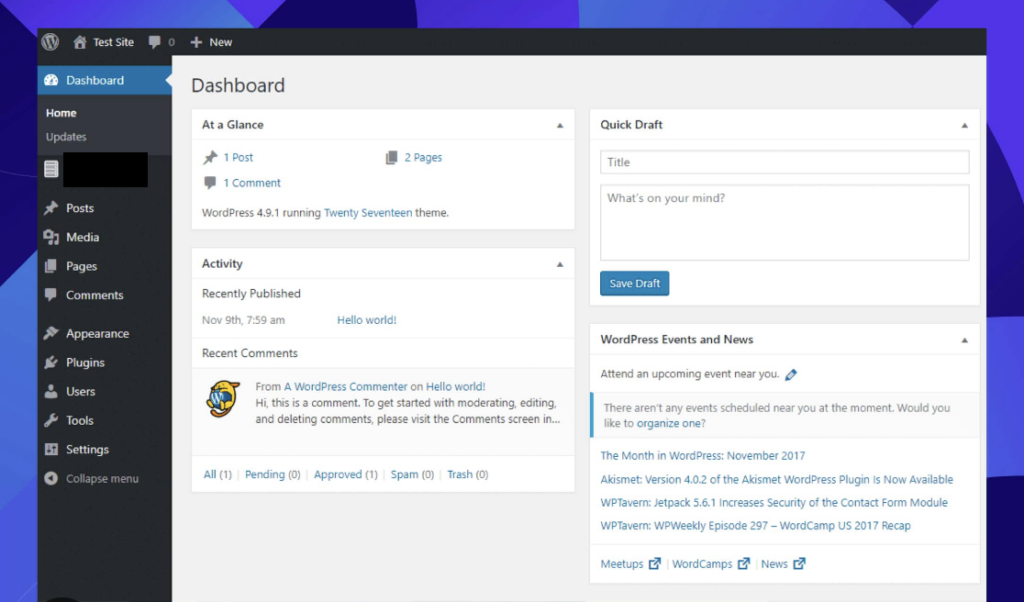
To remove the “www” prefix from your WordPress site’s URL directly in the dashboard, follow these steps:
- Access your WordPress admin panel by navigating to yourdomain.com/wp-admin and logging in with your credentials.
- Once logged in, look for the “Settings” option in the left-hand menu. Click on it to expand the submenu.
- In the submenu, click on “General” to access the general settings page.
- On the General Settings page, you’ll see two important fields: “WordPress Address (URL)” and “Site Address (URL)”.
- In both these fields, carefully remove the “www” prefix from the URLs. For example, change “http://www.yourdomain.com” to “http://yourdomain.com“.
- After making these changes, scroll to the bottom of the page and click the “Save Changes” button.
- WordPress will update your settings and refresh the page. Verify that the changes have been applied correctly.
Pro Tip: Before making these changes, it’s wise to note down your current settings. This precaution allows you to revert easily if needed.
Read More: How to Add Accordion in WordPress: Approaches to Explore
Ensuring Proper Redirection to Non-www
After updating your WordPress settings, it’s crucial to ensure proper redirection:
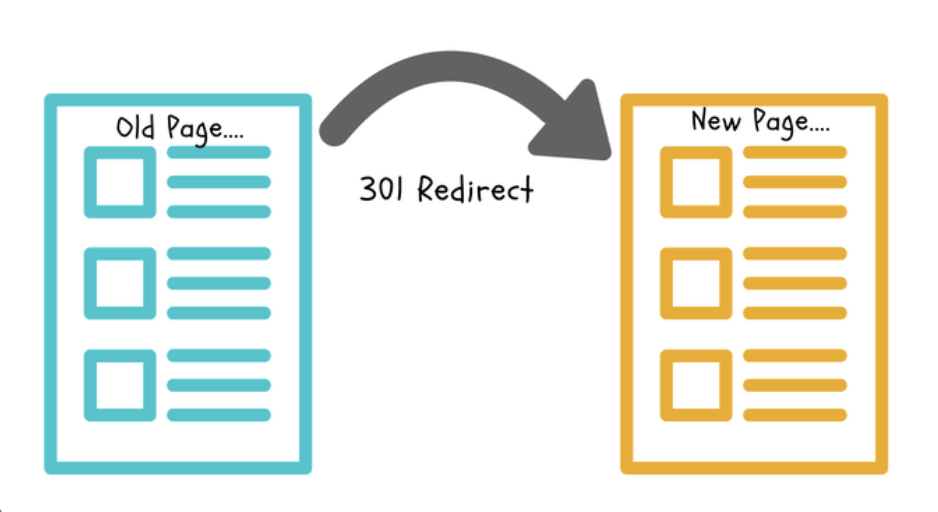
- Implement 301 redirects to automatically guide traffic from www to non-www URLs. This step is typically done at the server level and may require assistance from your hosting provider.
- Thoroughly review your site and update any internal links that still use the www prefix. This includes menu items, footer links, and any hardcoded links in your content or theme files.
- Log in to Google Search Console and submit a change of address request. This informs Google about your URL structure change and helps maintain your search rankings.
- Use Google Search Console’s URL inspection tool to check how Google sees your new URLs and ensure they’re being indexed correctly.
Pro Tip: Keep a close eye on your site’s traffic and search rankings in the weeks following the change. This vigilance allows you to quickly identify and address any potential issues that may arise from the URL structure change.
Also Check: Best WordPress Redirect Plugins (Free & Paid)
Redirecting to Non-www on Apache Servers
For websites hosted on Apache servers, follow these steps to set up redirects:

- Access your server’s file manager through your hosting control panel (often cPanel).
- Navigate to your website’s root directory, usually named “public_html”.
- Look for a file named “.htaccess“. If it’s not visible, you may need to enable “Show Hidden Files” in your file manager settings.
- Before making any changes, create a backup of the existing .htaccess file.
- Open the .htaccess file in a text editor.
Add the appropriate redirect code based on whether your site uses SSL: For sites with SSL (to redirect to non-www and force HTTPS):
RewriteEngine On
RewriteCond %{SERVER_PORT} 80
RewriteRule ^(.*)$ https://examplewebsite.com/$1 [R=301,L]
For sites without SSL (to redirect from www to non-www):
RewriteEngine On
RewriteCond %{HTTP_HOST} ^www.examplewebsite.com$
RewriteRule ^/?(.*)$ http://examplewebsite.com/$1 [R=301,L]
- Replace ‘examplewebsite.com’ with your actual domain name in the code.
- Save the changes to the .htaccess file.
- Test your website thoroughly to ensure the redirects are working as expected.
Pro Tip: Always create a backup of your .htaccess file before making changes. Errors in this file can make your entire site inaccessible, so having a backup allows for quick recovery if needed.
Read More: Multiple Ways to Fix WordPress Featured Image Not Showing
Redirecting to Non-www on Windows
For websites hosted on Windows servers, the process of setting up redirects involves modifying the web.config file. This file is crucial for configuring various aspects of your website on Windows servers. Here’s a detailed guide on how to implement the redirection:
- Finding and Backing Up the web.config File
Begin by locating the web.config file on your server. Typically, this file is found in the root directory of your website. If you’re unsure about its location or don’t have direct access to your server files, contact your hosting provider for assistance.
Once you’ve located the file, it’s critical to create a backup. This precautionary step allows you to restore your site’s configuration if anything goes wrong during the editing process. To create a backup:
- Right-click on the web.config file
- Select “Download” or “Copy”
- Save the backup file to a secure location on your local machine
- Editing the web.config File
After securing a backup, you can proceed to edit the web.config file:
- Open the file using a text editor. Notepad++ or Visual Studio Code are good options as they provide syntax highlighting for XML files.
- If the file is empty or doesn’t exist, you’ll need to create the basic structure.
- Look for the <system.webServer> section. If it doesn’t exist, you’ll need to add it.
- Adding Redirection Code
Now, you’ll add the code that handles the actual redirection. This code should be placed within the <system.webServer> section. If a <rewrite> section already exists, add the new rule within it. If not, you’ll need to create the <rewrite> section as well.
Insert the following code:
<system.webServer>
<rewrite>
<rules>
<rule name=”non-www redirect” enabled=”true” stopProcessing=”true”>
<match url=”.*” />
<conditions>
<add input=”{HTTP_HOST}” pattern=”^www.(.*)” />
</conditions>
<action type=”Redirect” redirectType=”Permanent” url=”https://{C:1}{REQUEST_URI}” />
</rule>
</rules>
</rewrite>
</system.webServer>
This code creates a rule that matches any URL starting with “www” and redirects it to the non-www version. It also forces HTTPS, which is recommended for security.
If your site doesn’t use SSL, replace “https://” with “http://” in the <action> tag’s url attribute.
- Save Changes
After adding the code:
- Save the file, ensuring you maintain its .config extension.
- If you’re editing directly on the server, the changes should take effect immediately.
- If you’re working on a local copy, upload the modified file back to your server, replacing the original.
After saving, it’s crucial to test your website thoroughly. Check various pages and ensure that:
- www URLs are correctly redirecting to non-www
- The site is accessible and functioning normally
- If you included the HTTPS redirect, verify that all pages are secure
Pro Tip: If you encounter any issues after implementing these changes, don’t panic. You can always revert to the backup you created in step 1. It’s also a good idea to clear your browser cache when testing to ensure you’re seeing the most recent version of your site.
More to Check: Your Go-To Guide for Hiring Dedicated WordPress Developers
Possible Challenges and Troubleshooting
While removing “www” from your WordPress site can be beneficial, it’s not without potential pitfalls. Here are some challenges you might encounter and how to address them:
- SSL Certificate Issues: After removing “www”, you may find that your SSL certificate no longer validates. This is often because the certificate was issued for the “www” version of your domain. To resolve this, you’ll need to obtain a new SSL certificate that covers both the “www” and non-www versions of your domain.
- Email Configuration Problems: If your email is hosted on the same domain as your website, removing “www” could potentially disrupt your email service. This is because many email systems rely on MX records that may be tied to the “www” subdomain. To troubleshoot, review and update your domain’s MX records to ensure they point to the correct mail servers without relying on “www”.

- Broken Internal Links: Your site may contain hardcoded internal links that still use the “www” prefix. These will need to be updated manually. Use a broken link checker tool to identify any problematic links after making the change.
- Caching Issues: Web browsers and CDNs may cache your old “www” URLs, causing inconsistent behavior for some users. Clear your website’s cache and CDN after making the change, and consider adding cache-busting measures to ensure all users see the updated site.
More Relevant Reading: Exploring the Impact of Content Delivery Networks on WordPress Speed
- Search Engine Indexing: Search engines may take time to recognize and index your new URL structure fully. Use Google Search Console to submit your new sitemap and monitor how search engines are crawling and indexing your site post-change.
- Third-Party Service Disruptions: Services integrated with your website (like analytics tools or social media plugins) may need to be reconfigured to recognize the new URL structure. Review and update the settings for all third-party code-related services connected to your site.
Also Important: How Can Third-Party Tags Impact Performance?
Conclusion
Removing “www” from your WordPress site’s URL can be a significant step towards a cleaner, more modern web presence. While the process involves careful planning and execution, the benefits in terms of branding, user experience, and potentially SEO can be substantial. By following the steps outlined in this guide and being prepared for potential challenges, you can successfully transition your site to a sleeker URL structure. Remember, thorough testing and monitoring are key to ensuring a smooth transition. With patience and attention to detail, you can give your WordPress site a professional update that aligns with current web trends and user preferences.


